You can facilitate multiple markers by either using Group mode under Common module settings for Turnitin and Moodle assignment or Marking workflow for Moodle assignments.
We recommend using the Groups method as the Marking workflow method is more complex to setup and requires additional steps to release the final grades and feedback to students.
Groups
Students must first be added to groups.
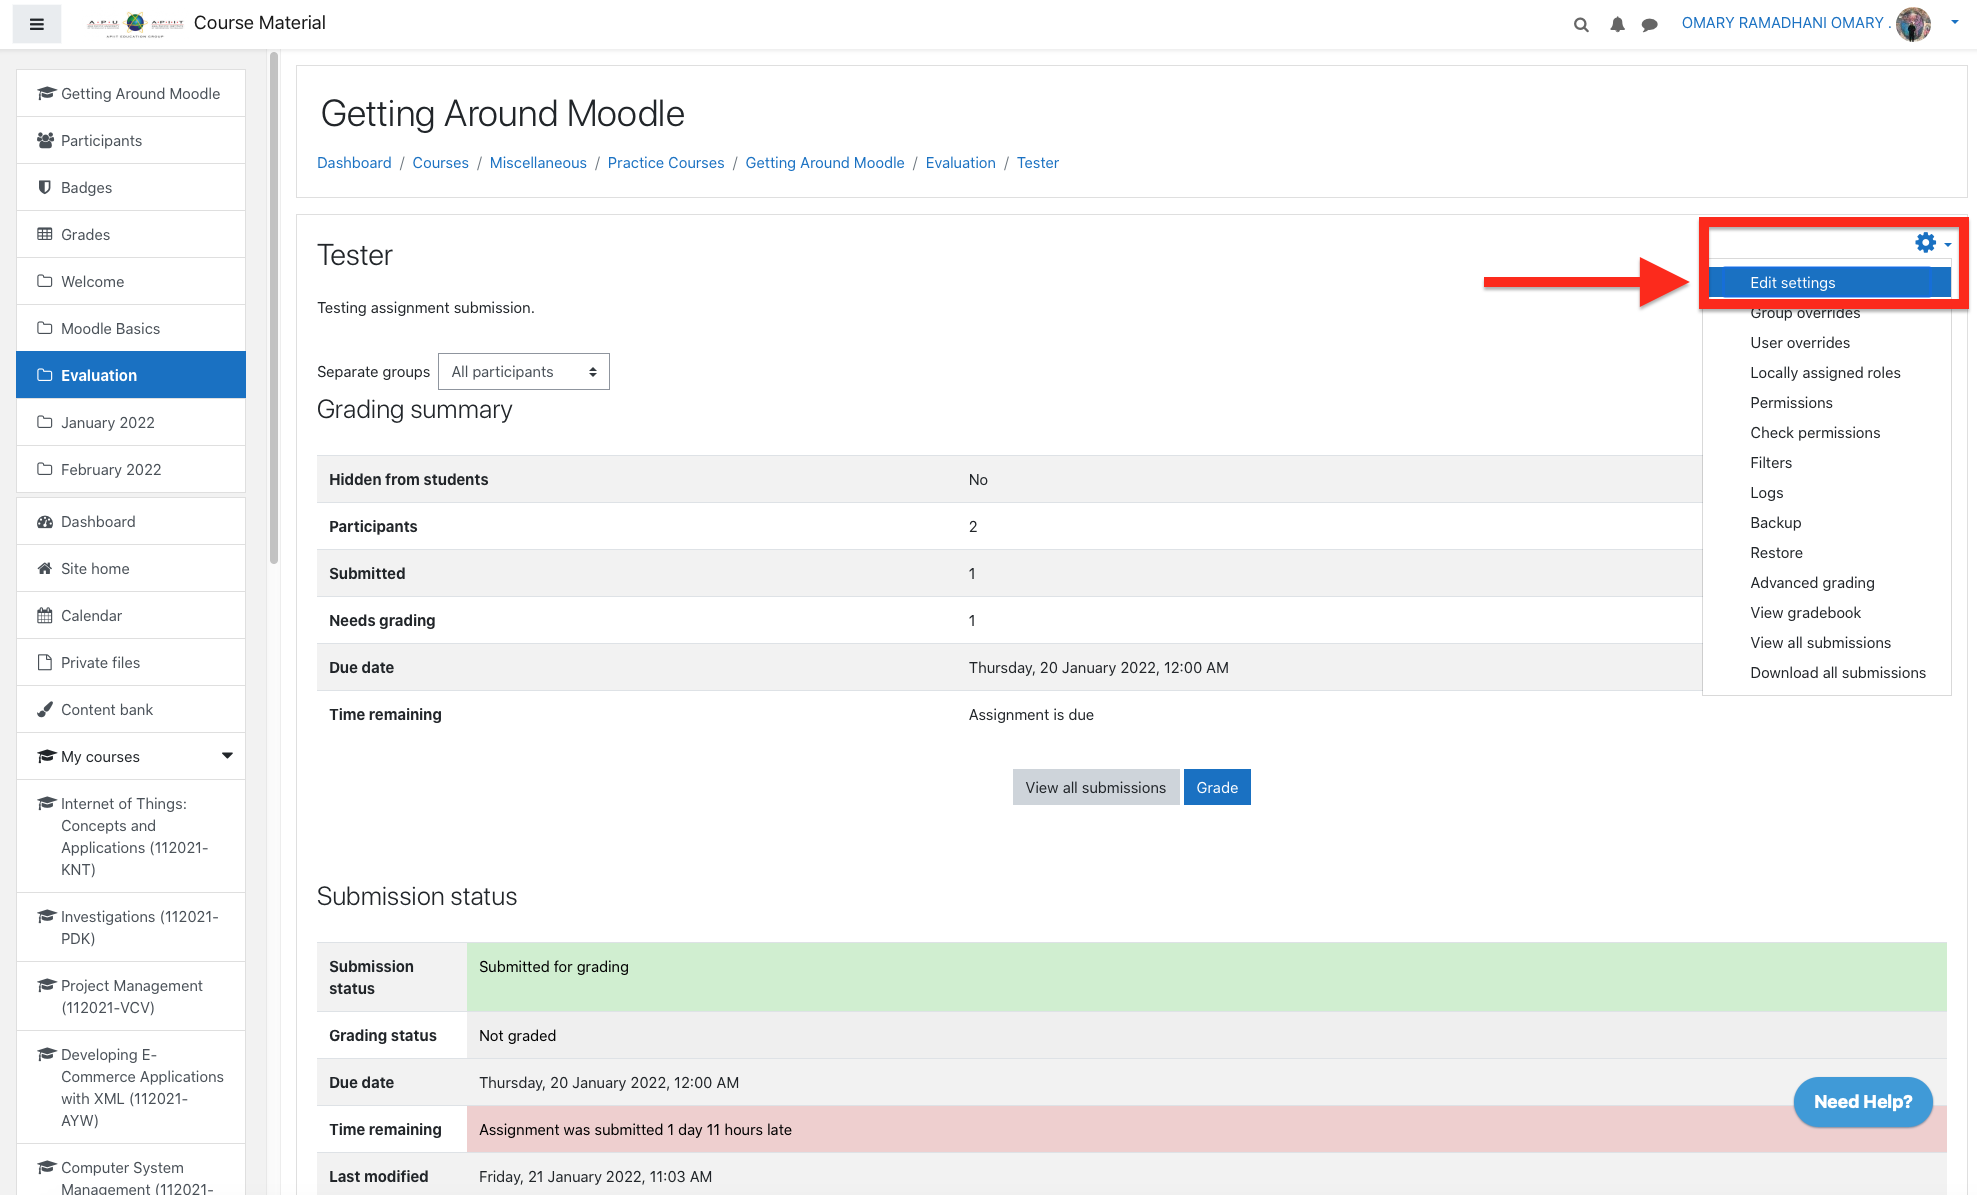
Step 1- Open the assignment you want to edit, click on the ⚙ icon and click on edit settings.
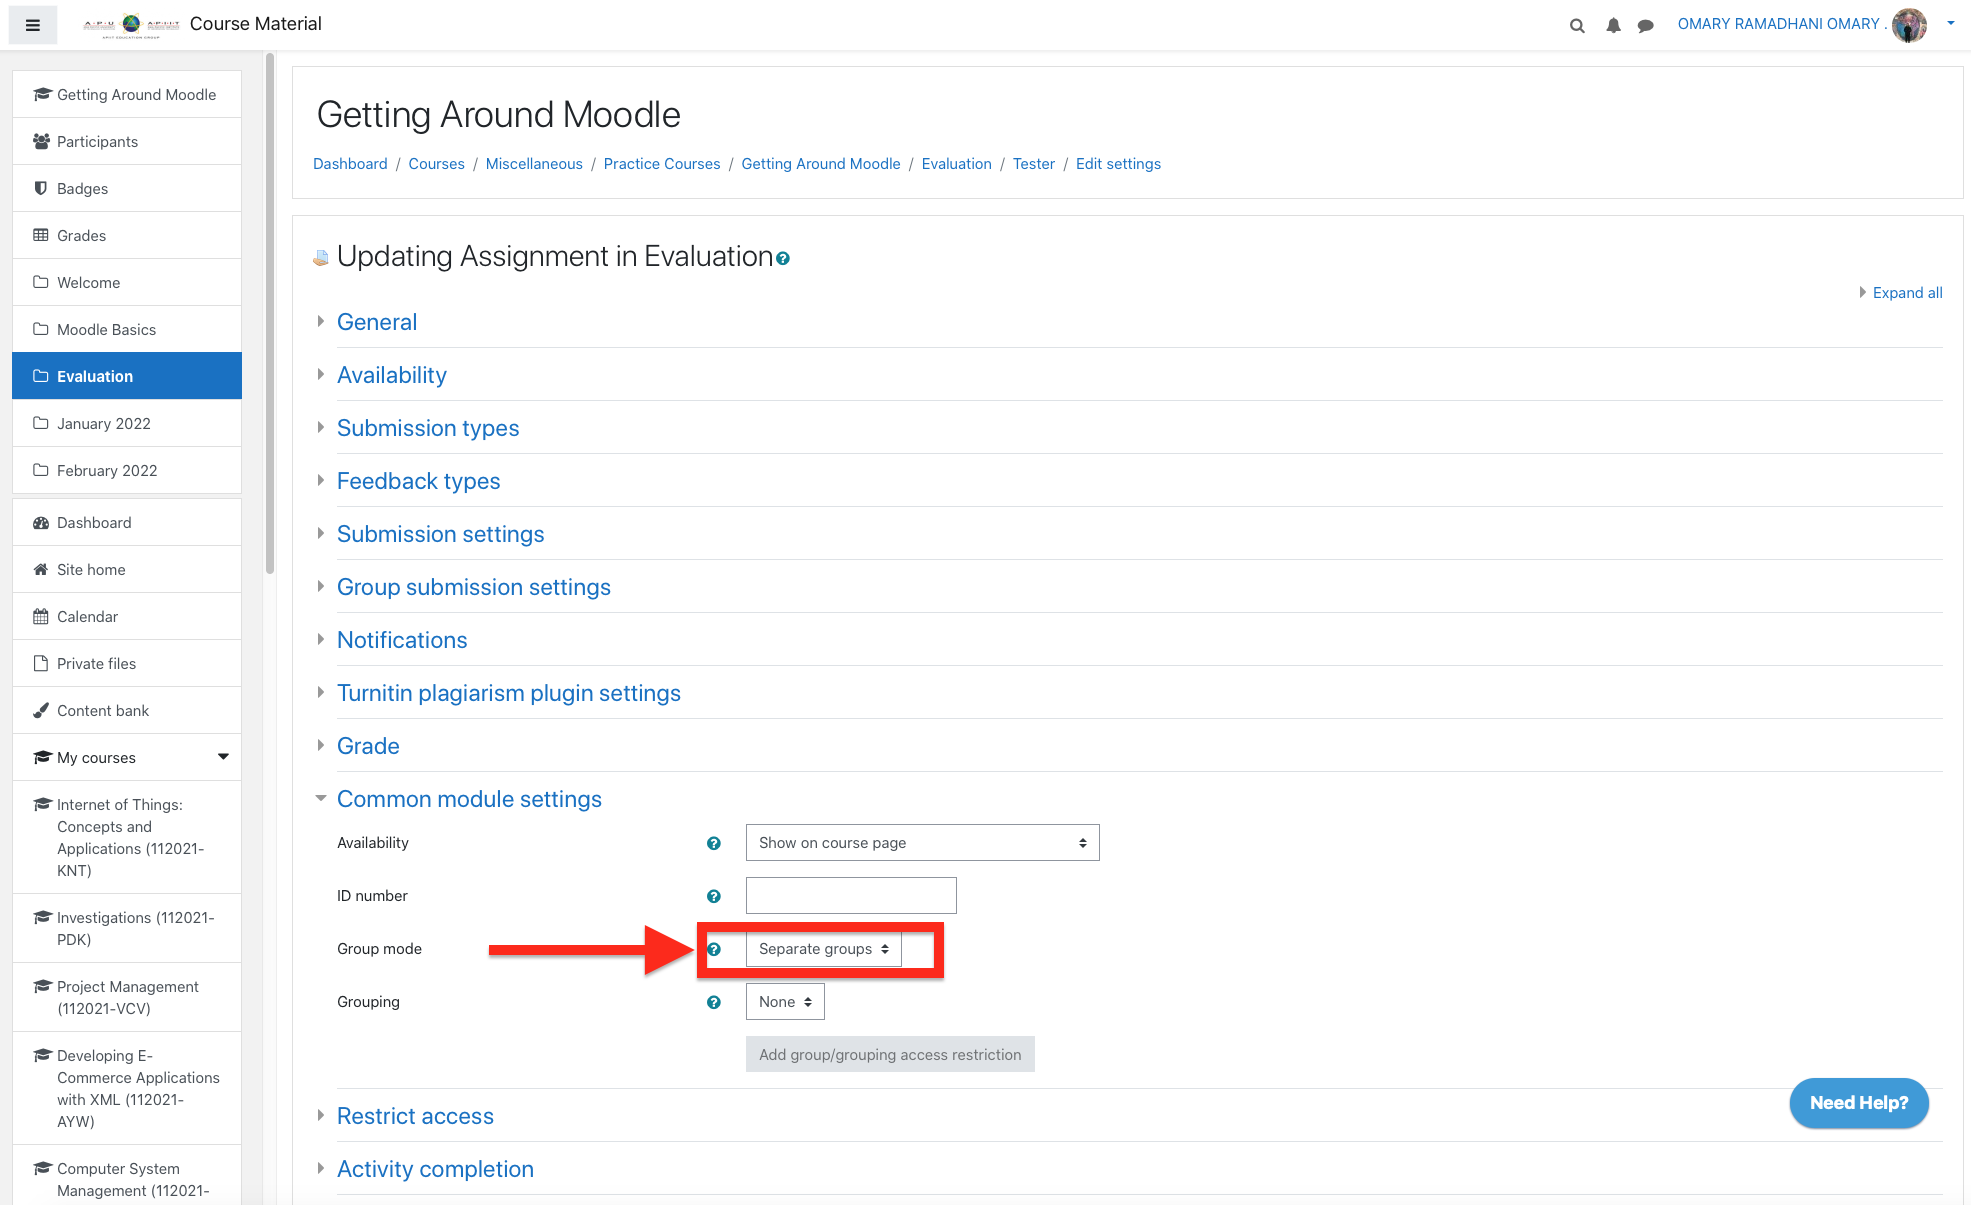
Step 2- Set Group mode (under Common module settings) to Separate groups. You may also first try directly proceeding to step 5 as this setting should be the default already.
Step 3- Scroll down to Restrict access.
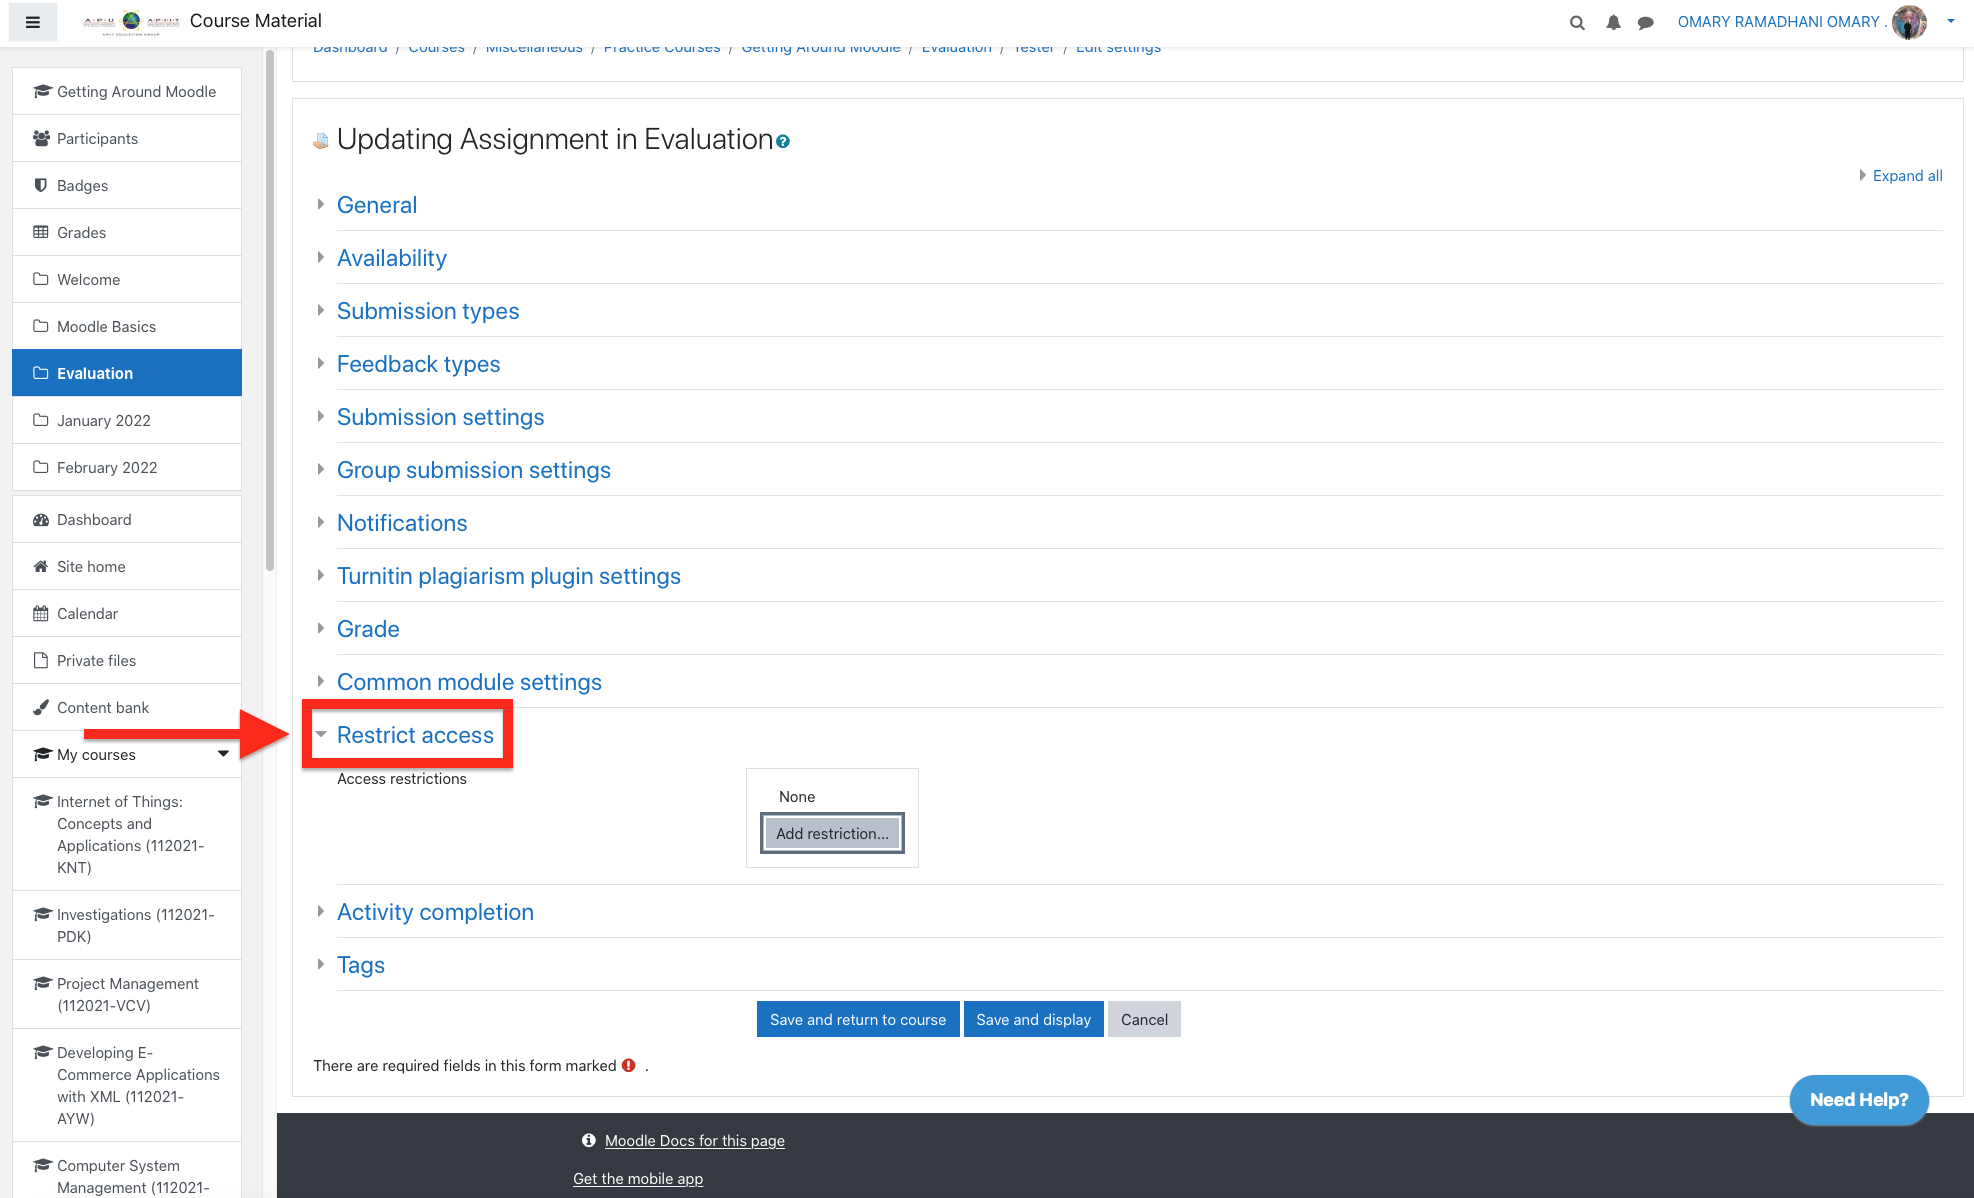
Step 4- Click on Add restriction and select Group.

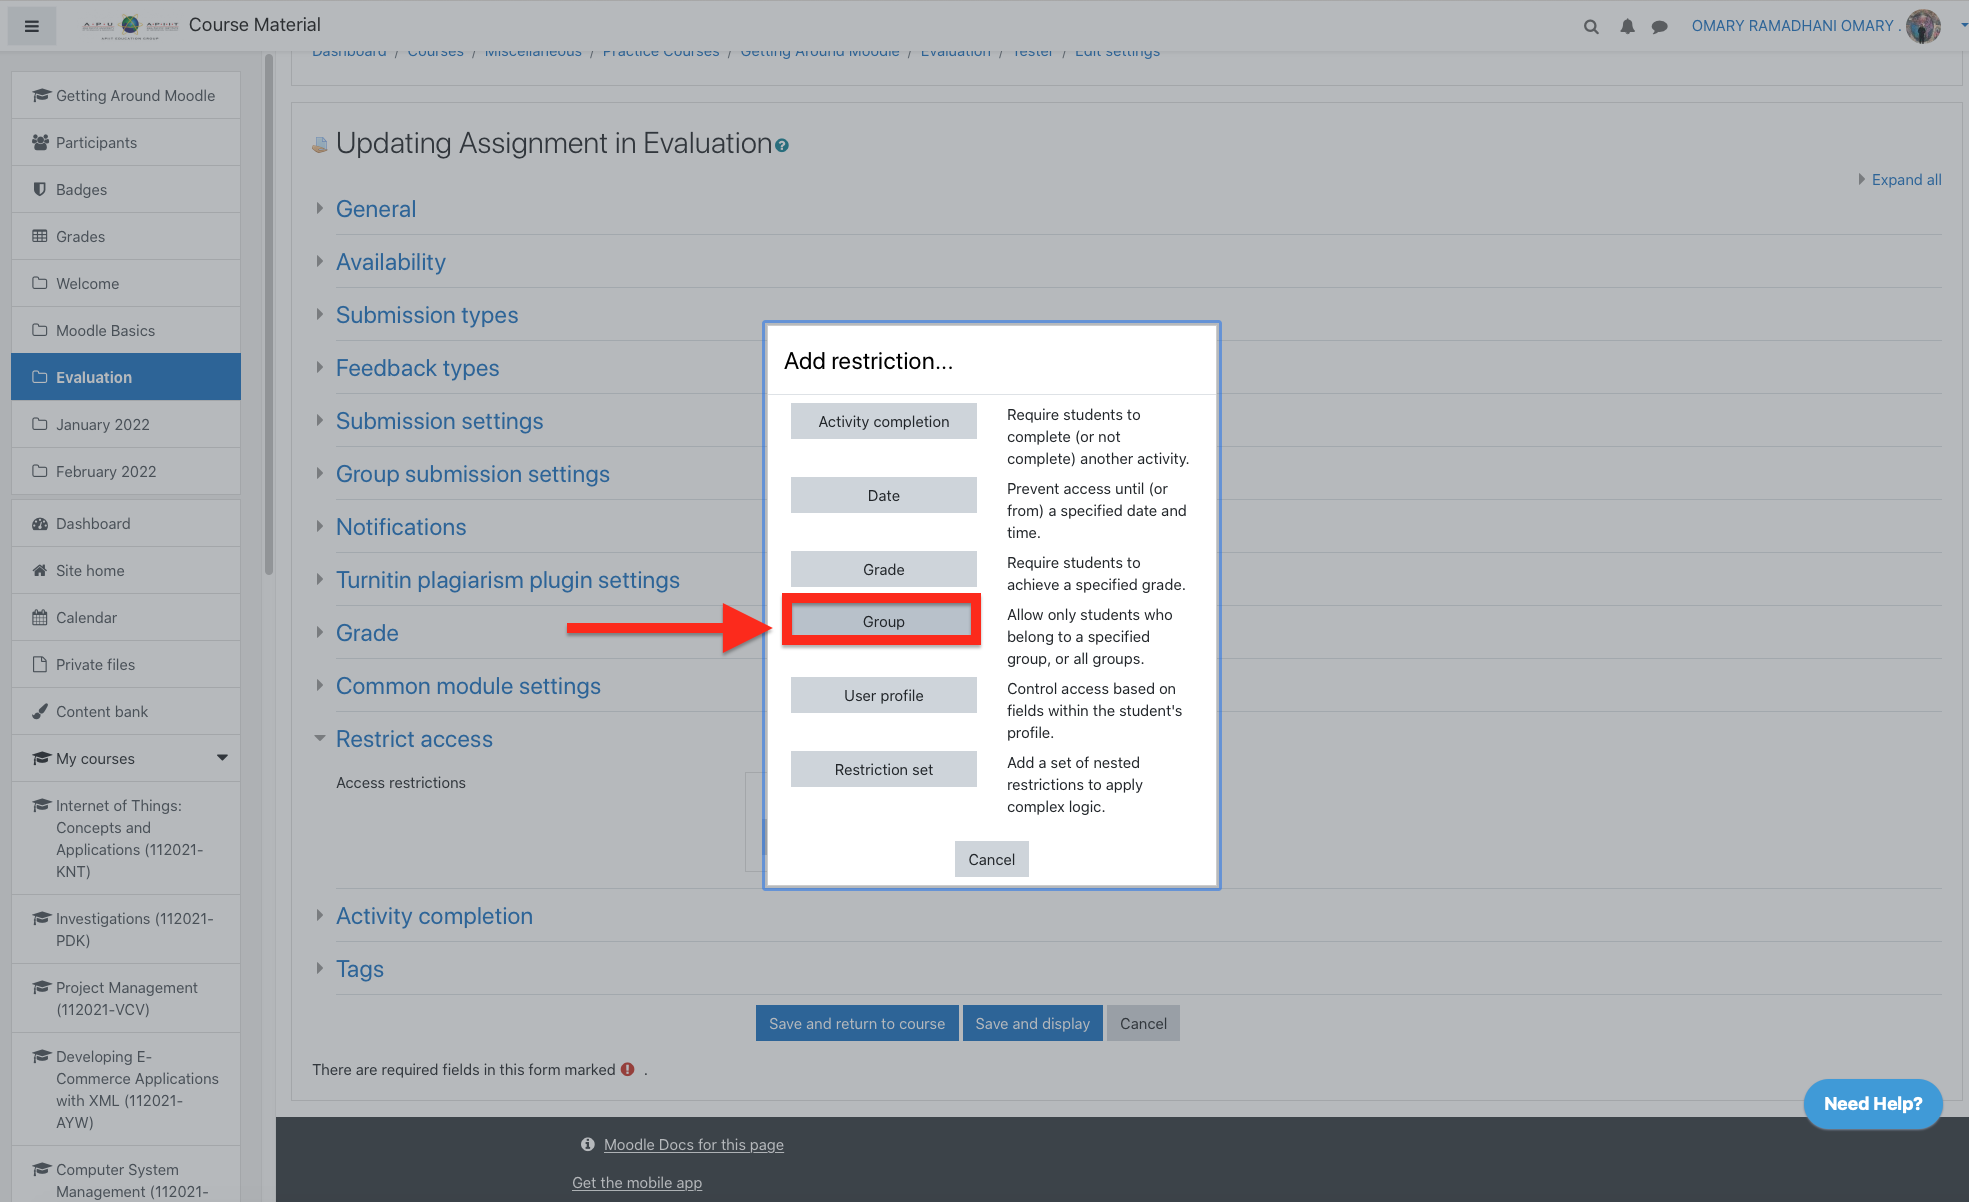
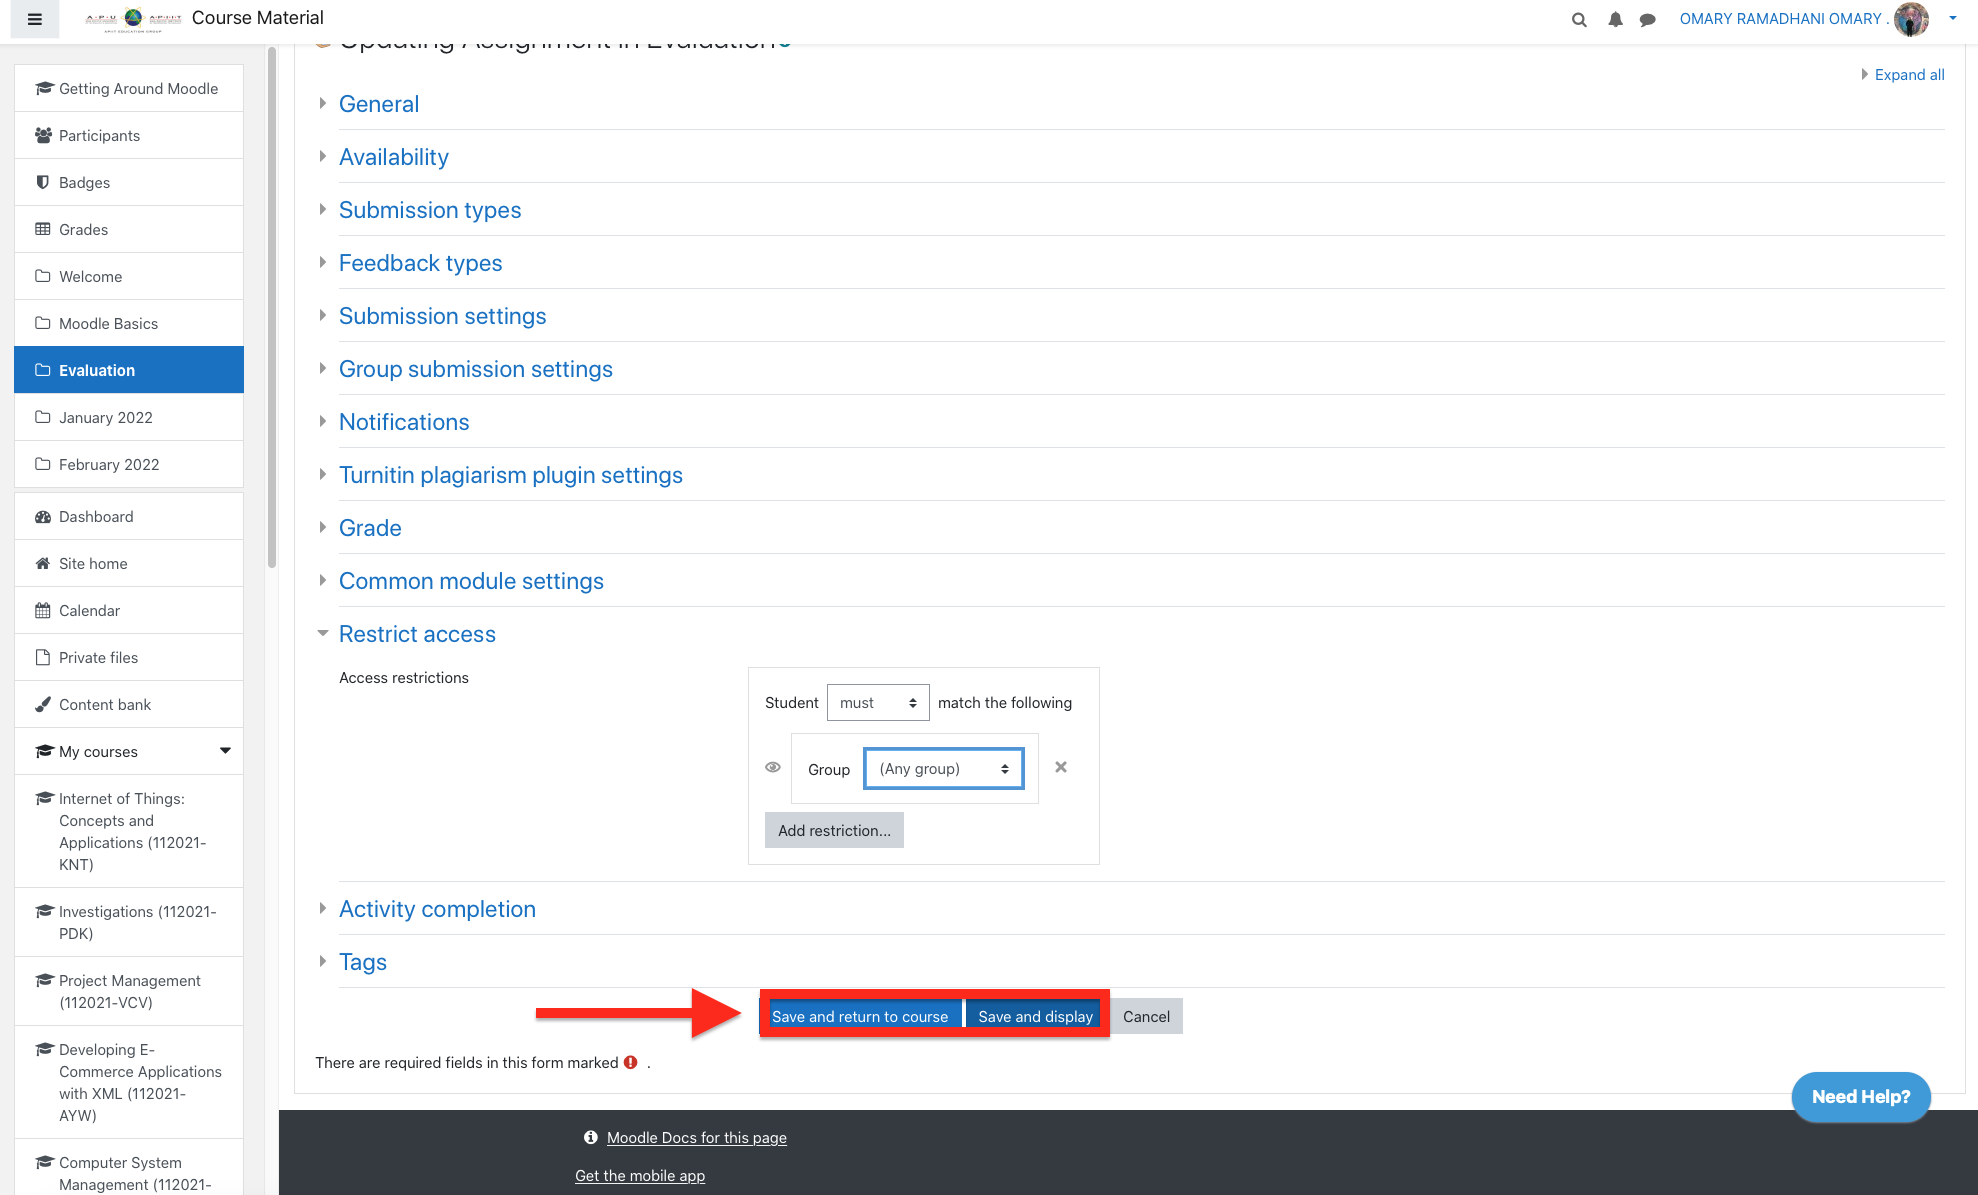
Step 5- Select the group you wish to give exclusive access to.

Step 6- Save your changes.
Marking workflow
If you enable Marking workflow then marks will go through a series of workflow stages before being released to students. You can then use the Marking allocation feature to allocate markers to particular students.
Step 1- When setting up your assignment, scroll down to Grade.
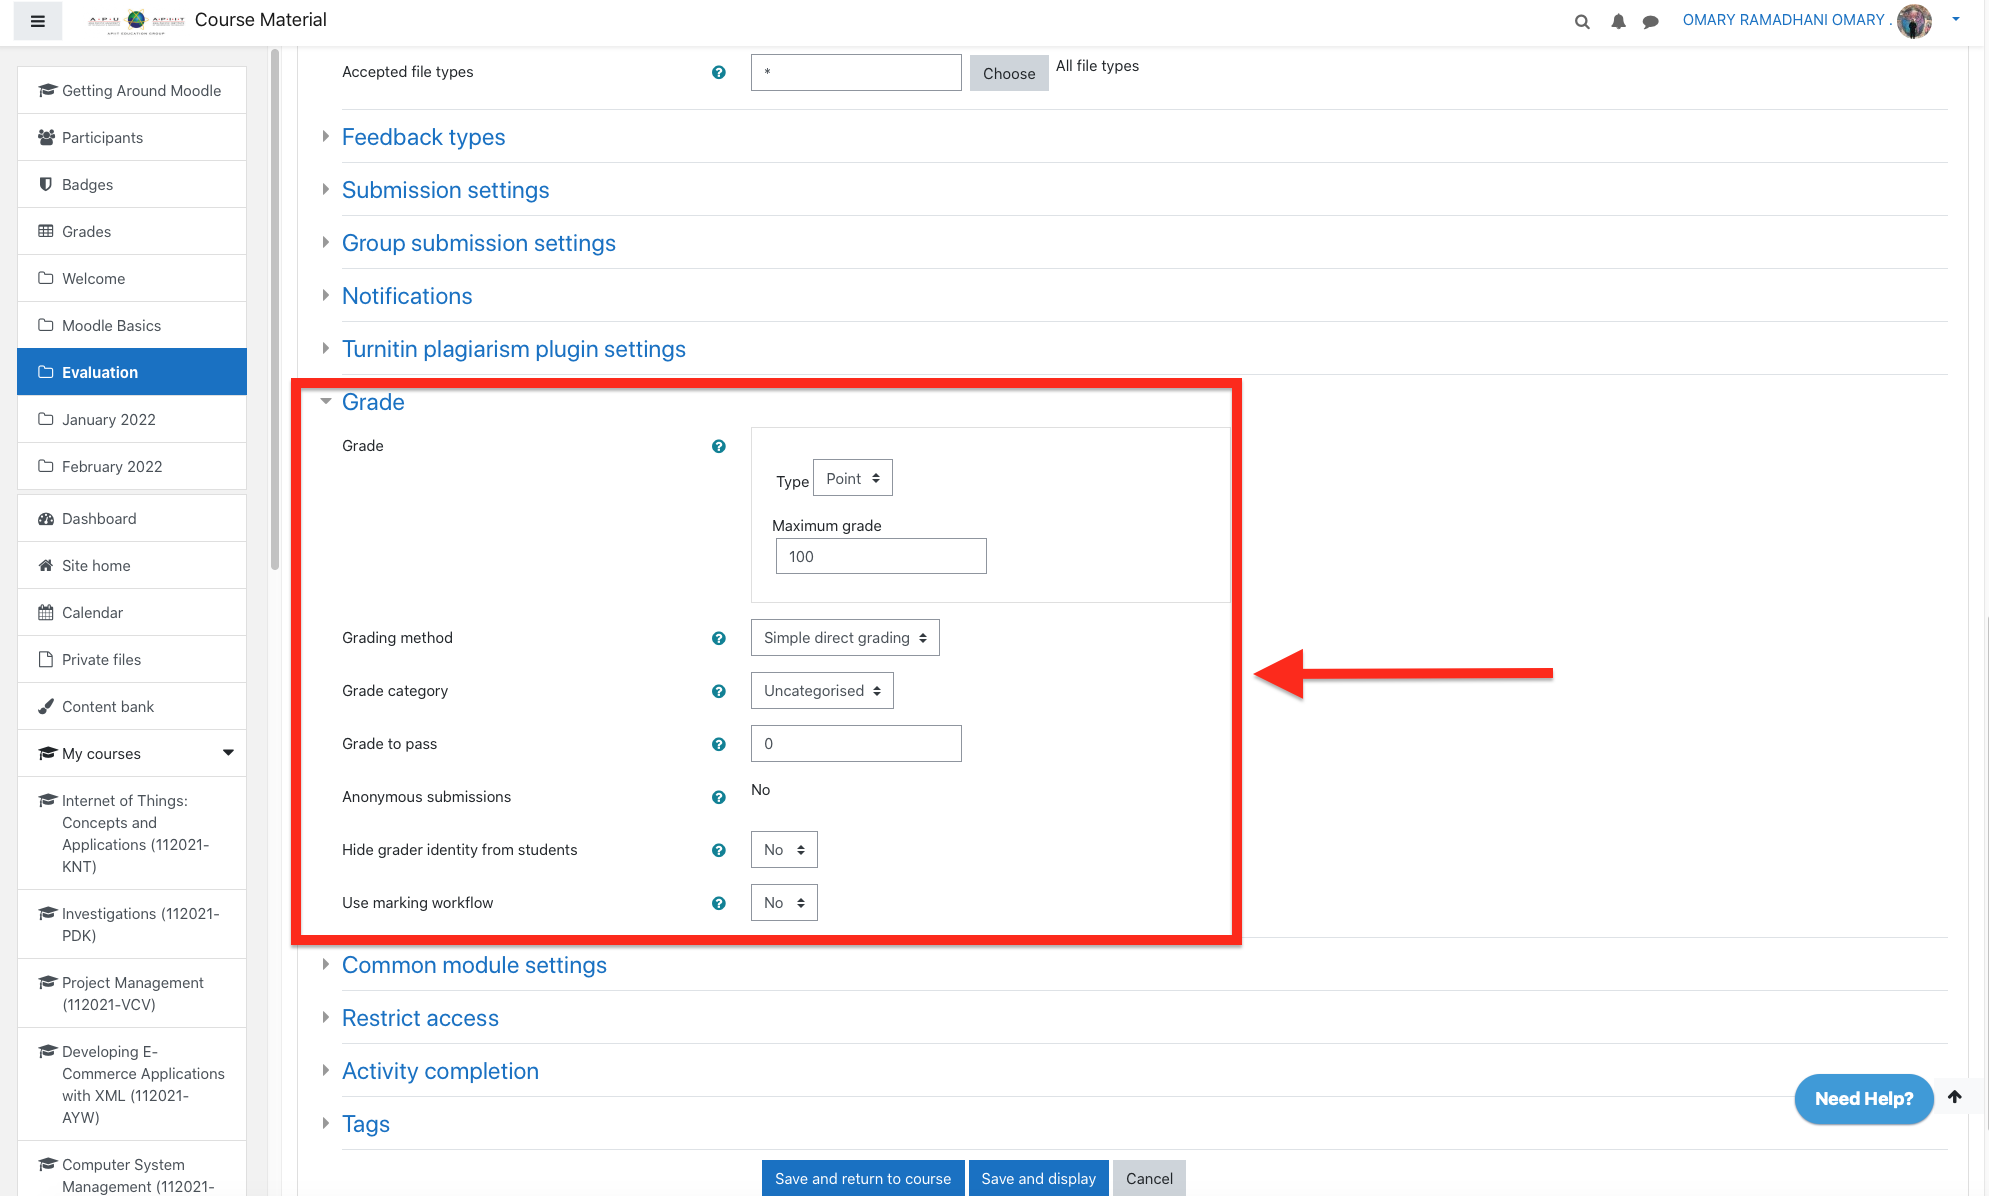
Step 2- Set Use Marking workflow, and Use marking allocation to Yes.
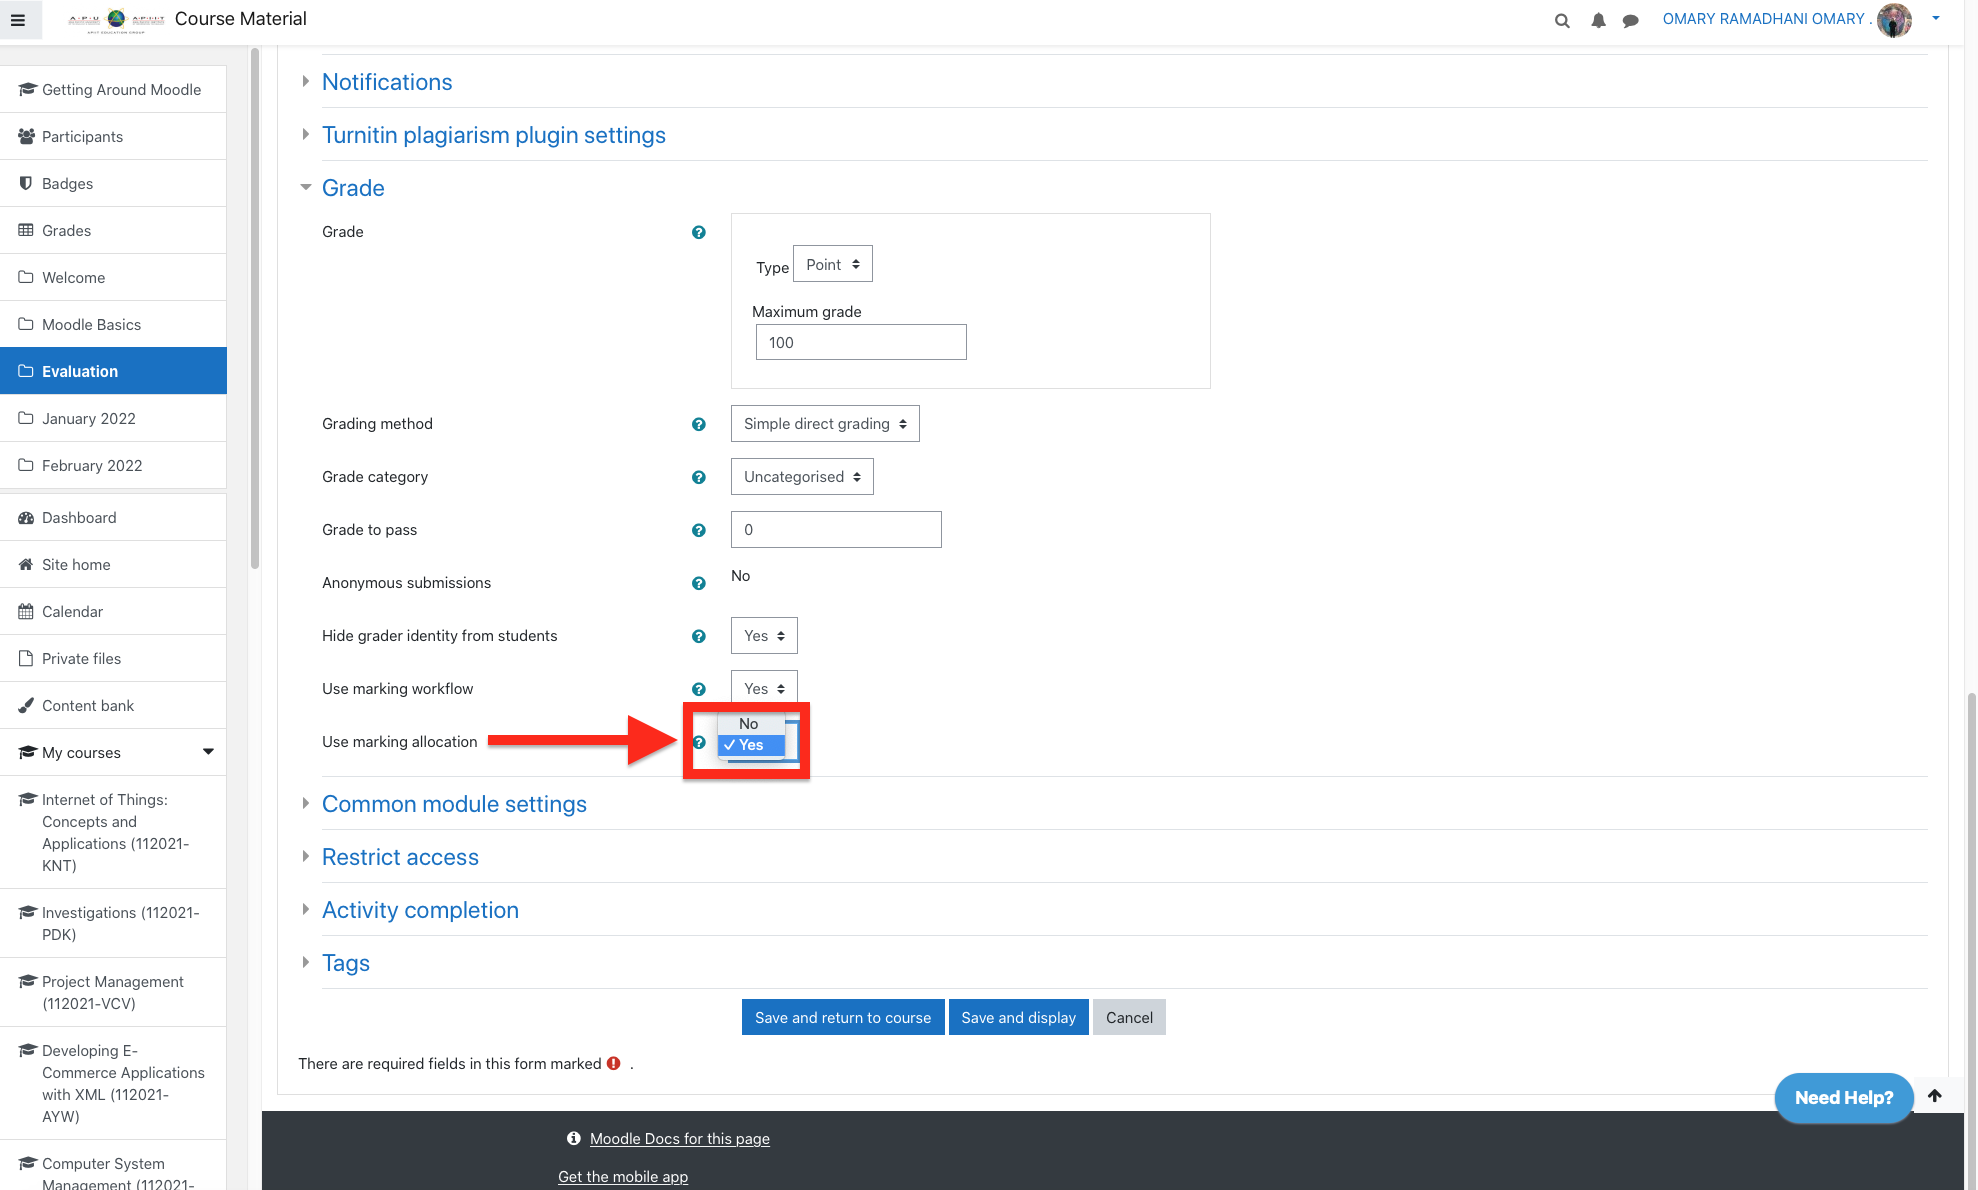
Step 3 - Save your changes.
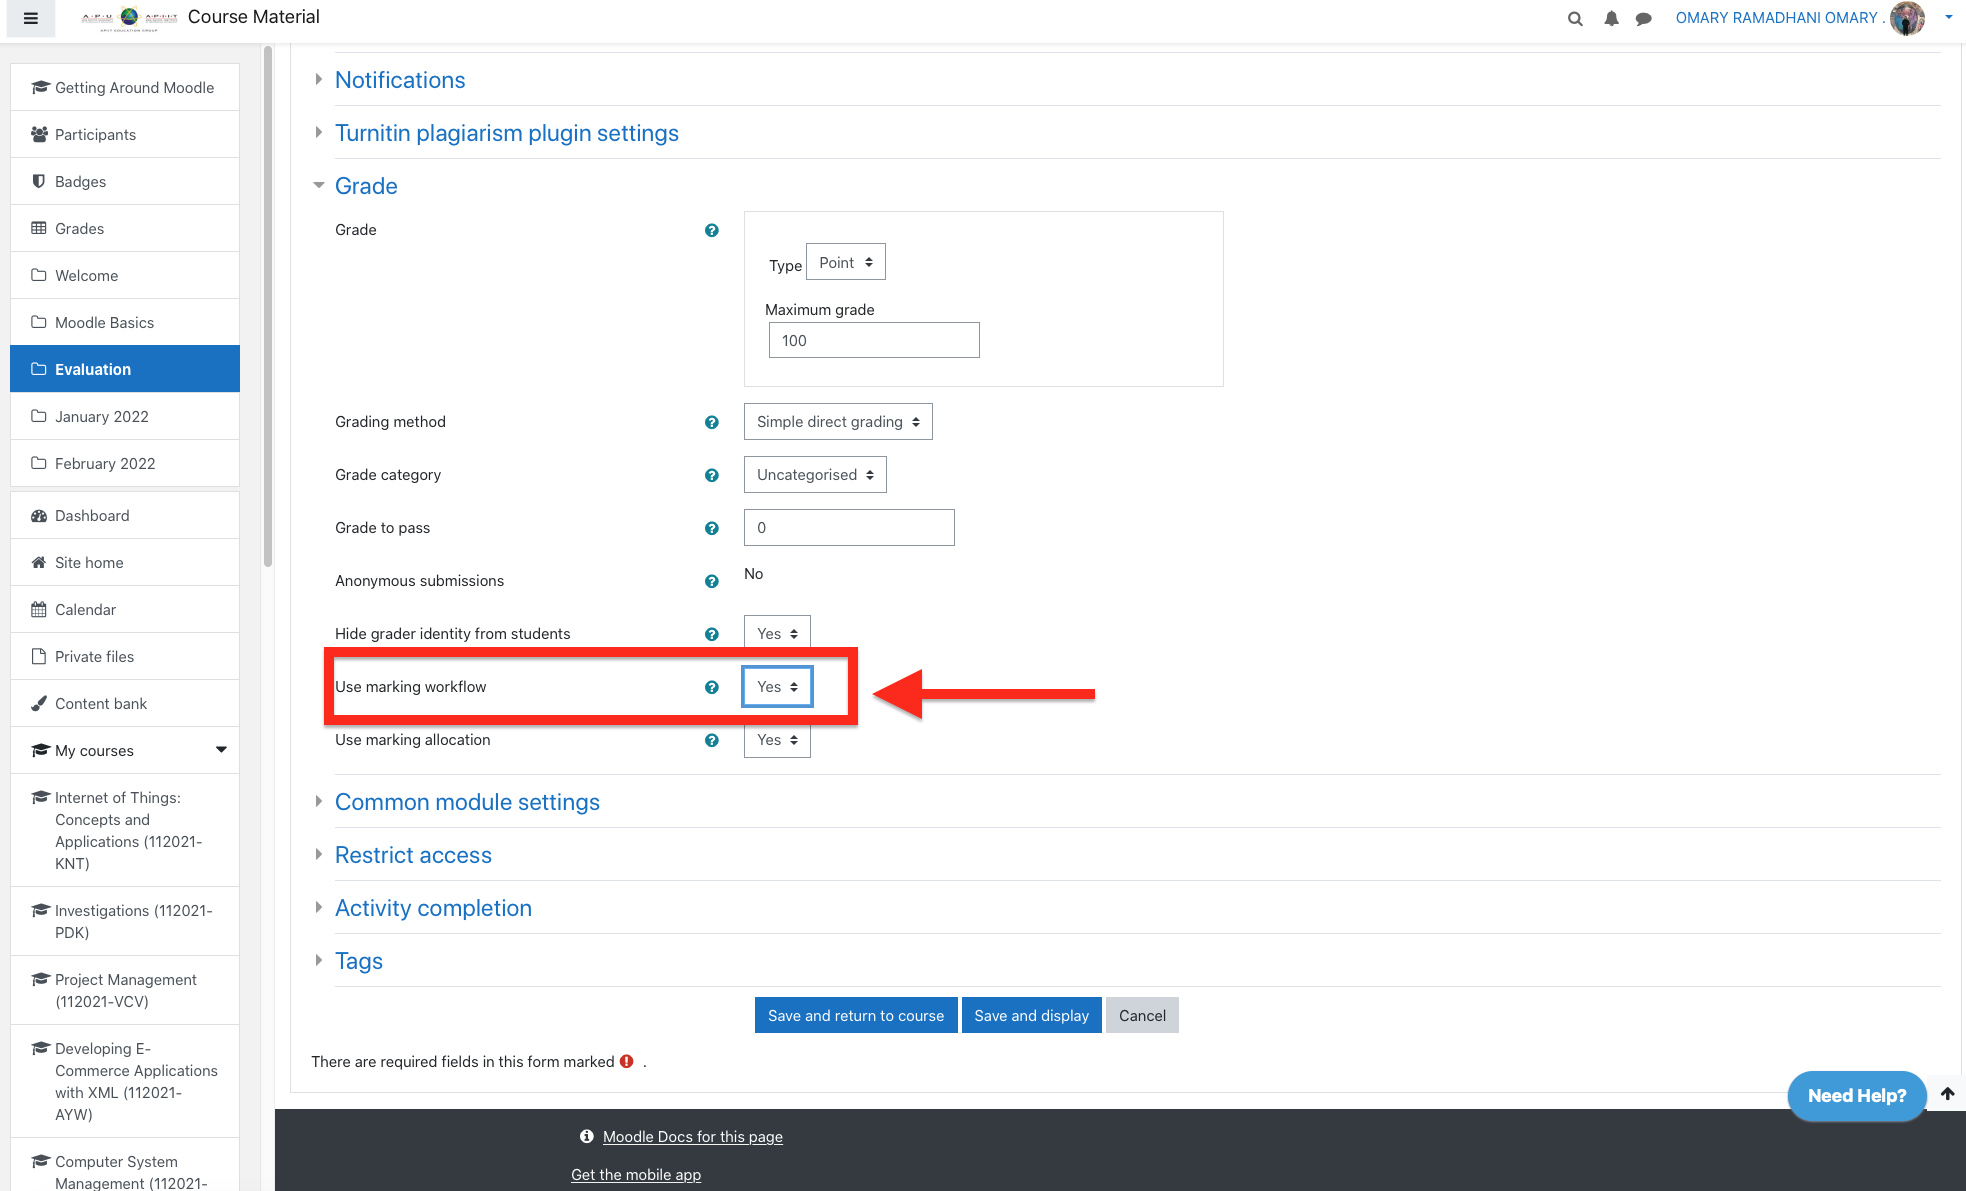
Step 4- When setting up your assignment under the Grade settings, set Use Marking workflow, and Use marking allocation to Yes.
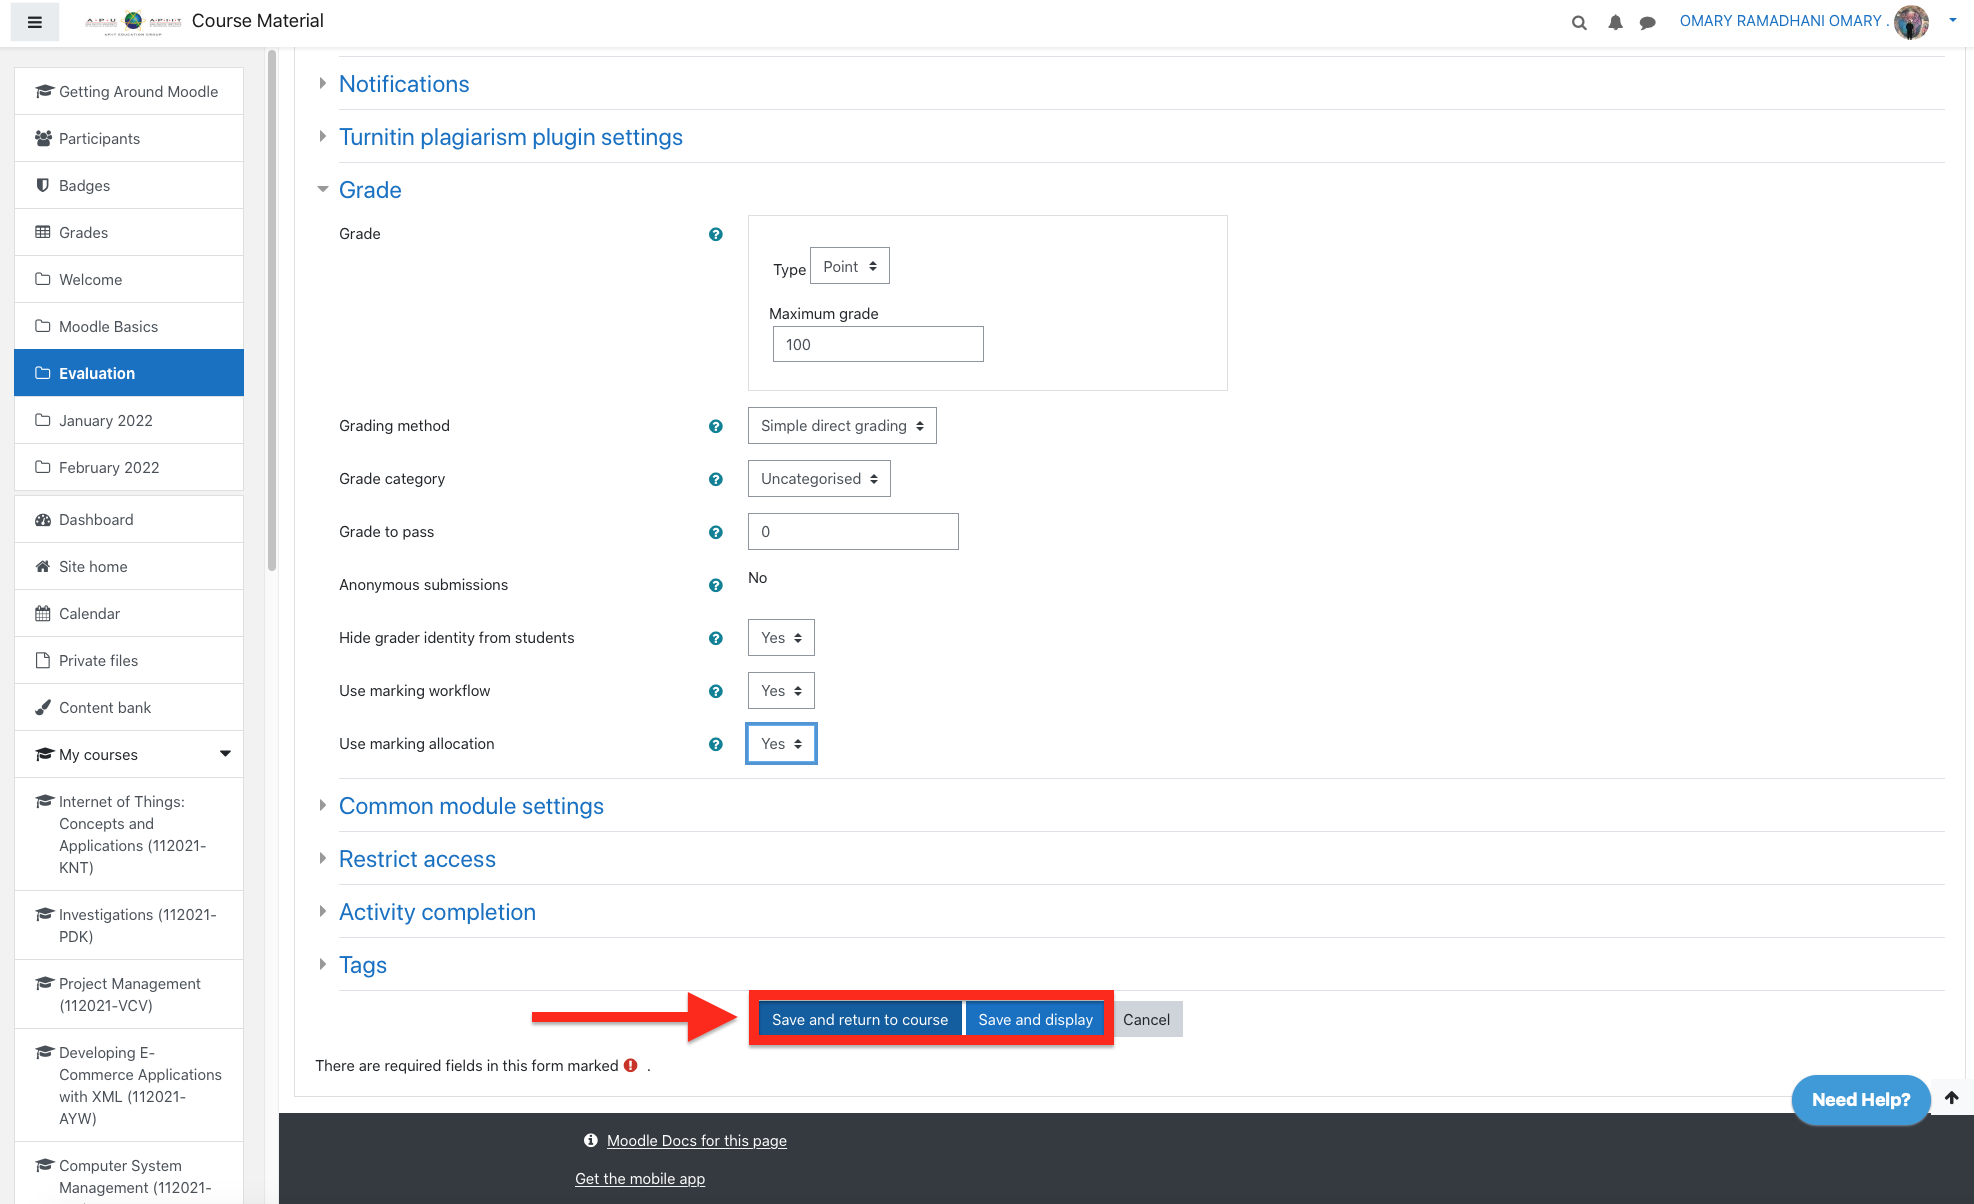
Step 5- Save your changes.
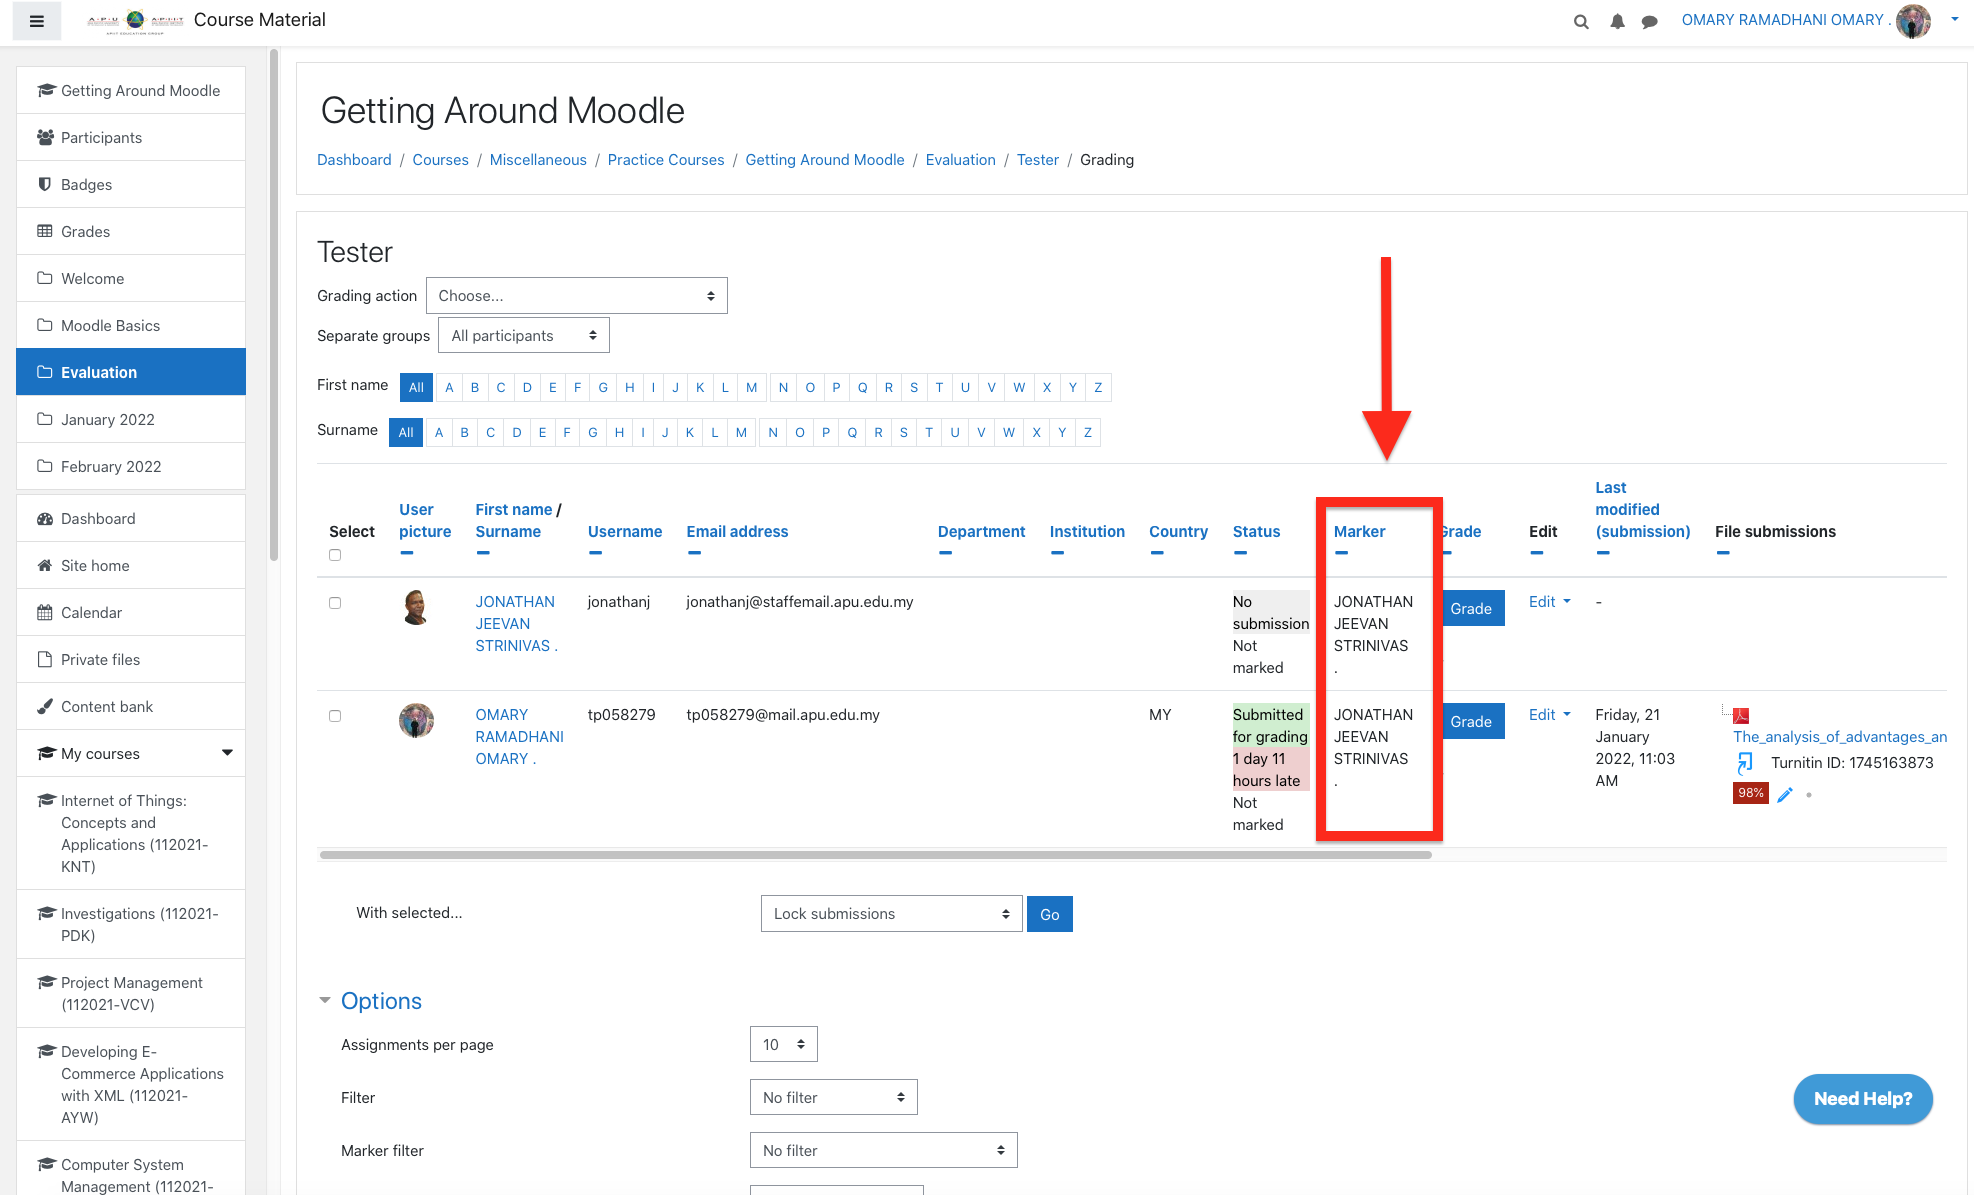
Step 6- Open the assignment you wish to adjust and select view all submissions.

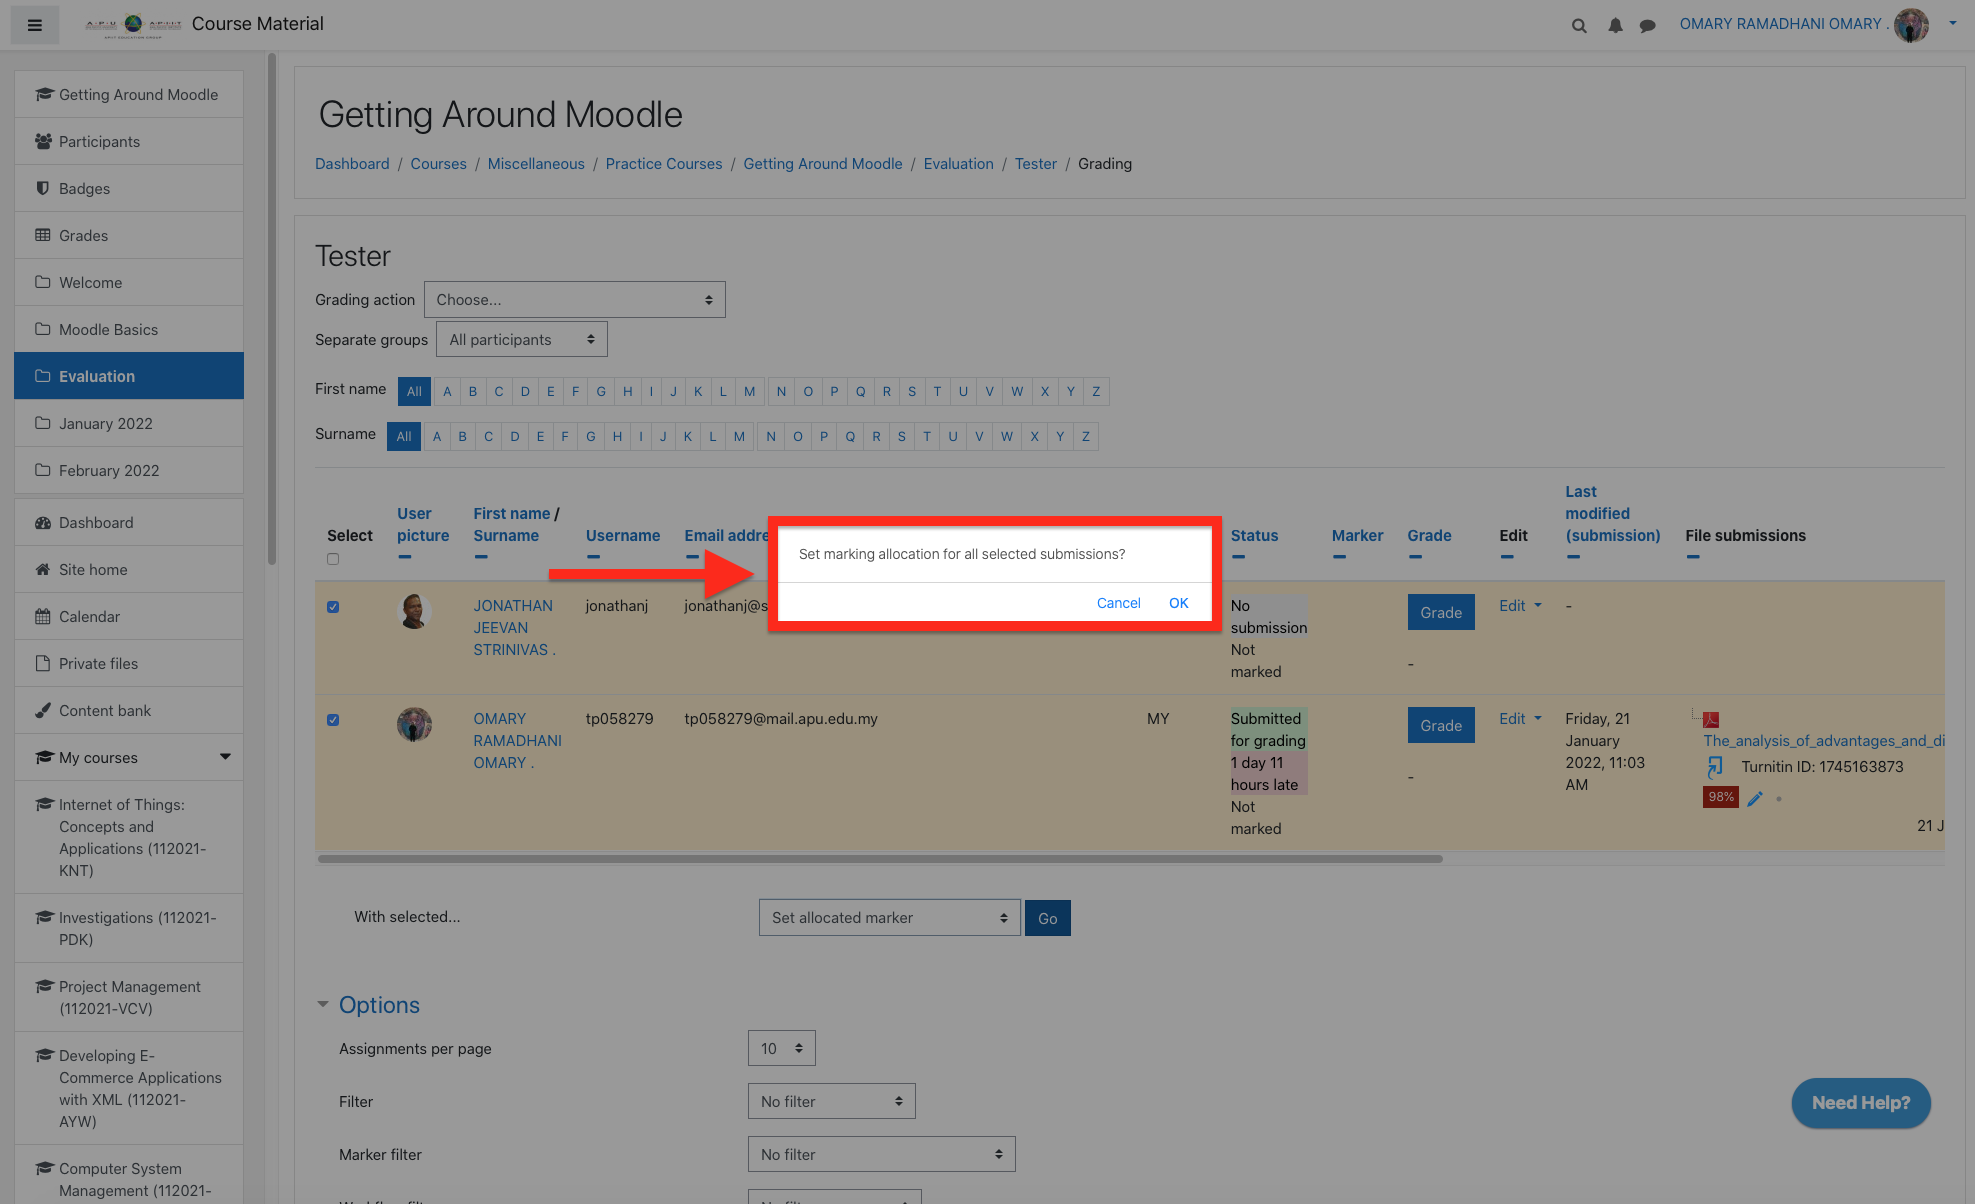
Step 7- Check the boxes alongside the students who you want to allocate to a specific marker. Scroll down to With selected… and select Set allocated marker and then click Go.
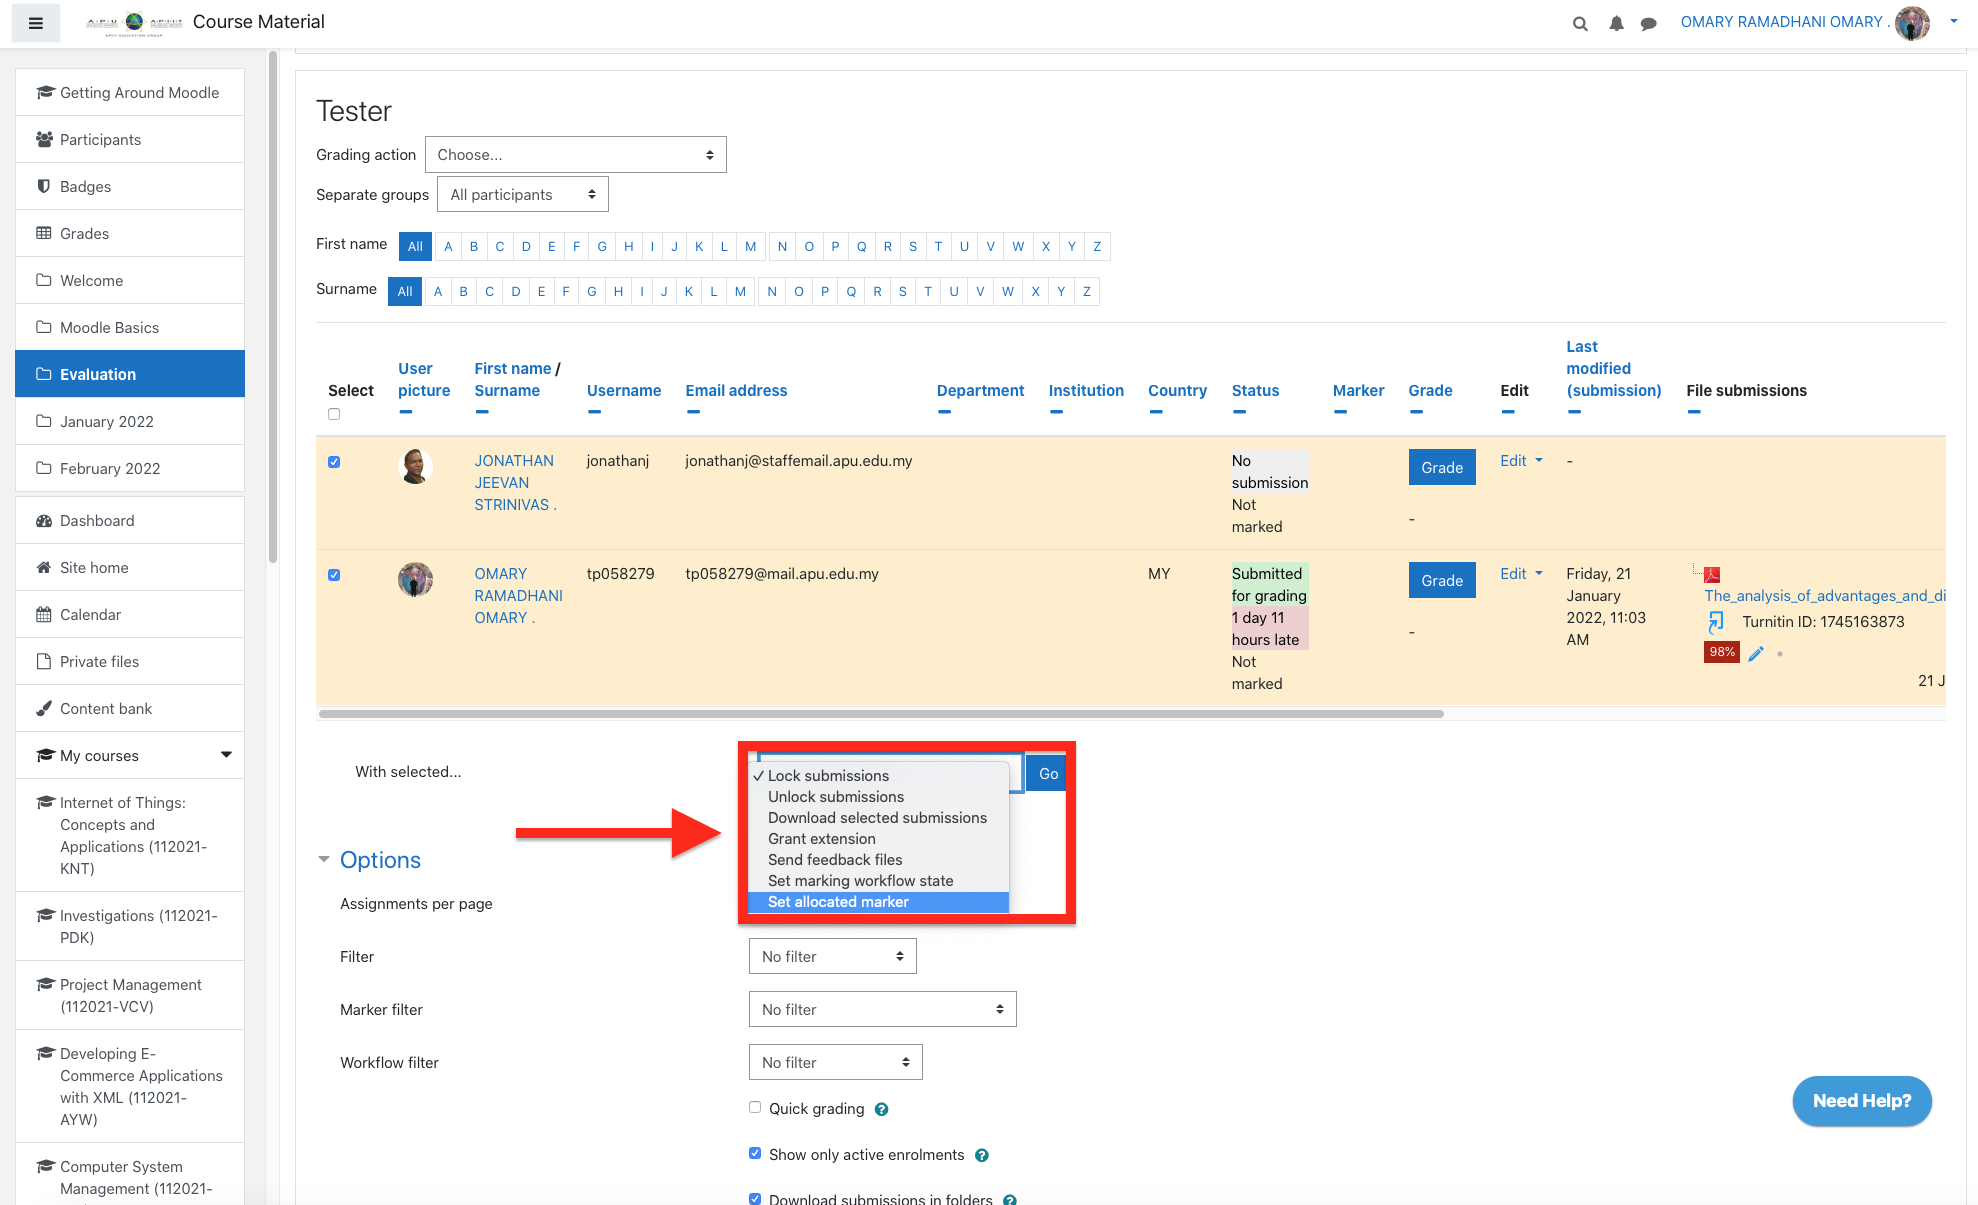
Then click OK.
The marker’s name then appears in the Marker report area.