...
This article will highlight the steps to configure your Windows OS device to connect to this new network.
...
Initial setup for OnBoard@APU
Step 1 . - To start connecting to OnBoard@APU, turn on your Wi-Fi on your Windows device and connect to the Onboard@APU network.
...
Step 2 . - Open your Browser and enter https://onboard.apiit.edu.my. Once redirected to the website, Click Accept & Proceed.
...
Step 3 . - In this page, select the network according to your situation. If you are:
...
| Info |
|---|
APU Staff should use their APKey/Office 365 Username & Password to log in. |
...
Step 4 . - If you are a staff or student, you will be presented with a login screen. Enter your APKey credentials (Example as below) and click Continue.
Student | Staff | ||||
|---|---|---|---|---|---|
| |||||
|
|
Prerequisite installation
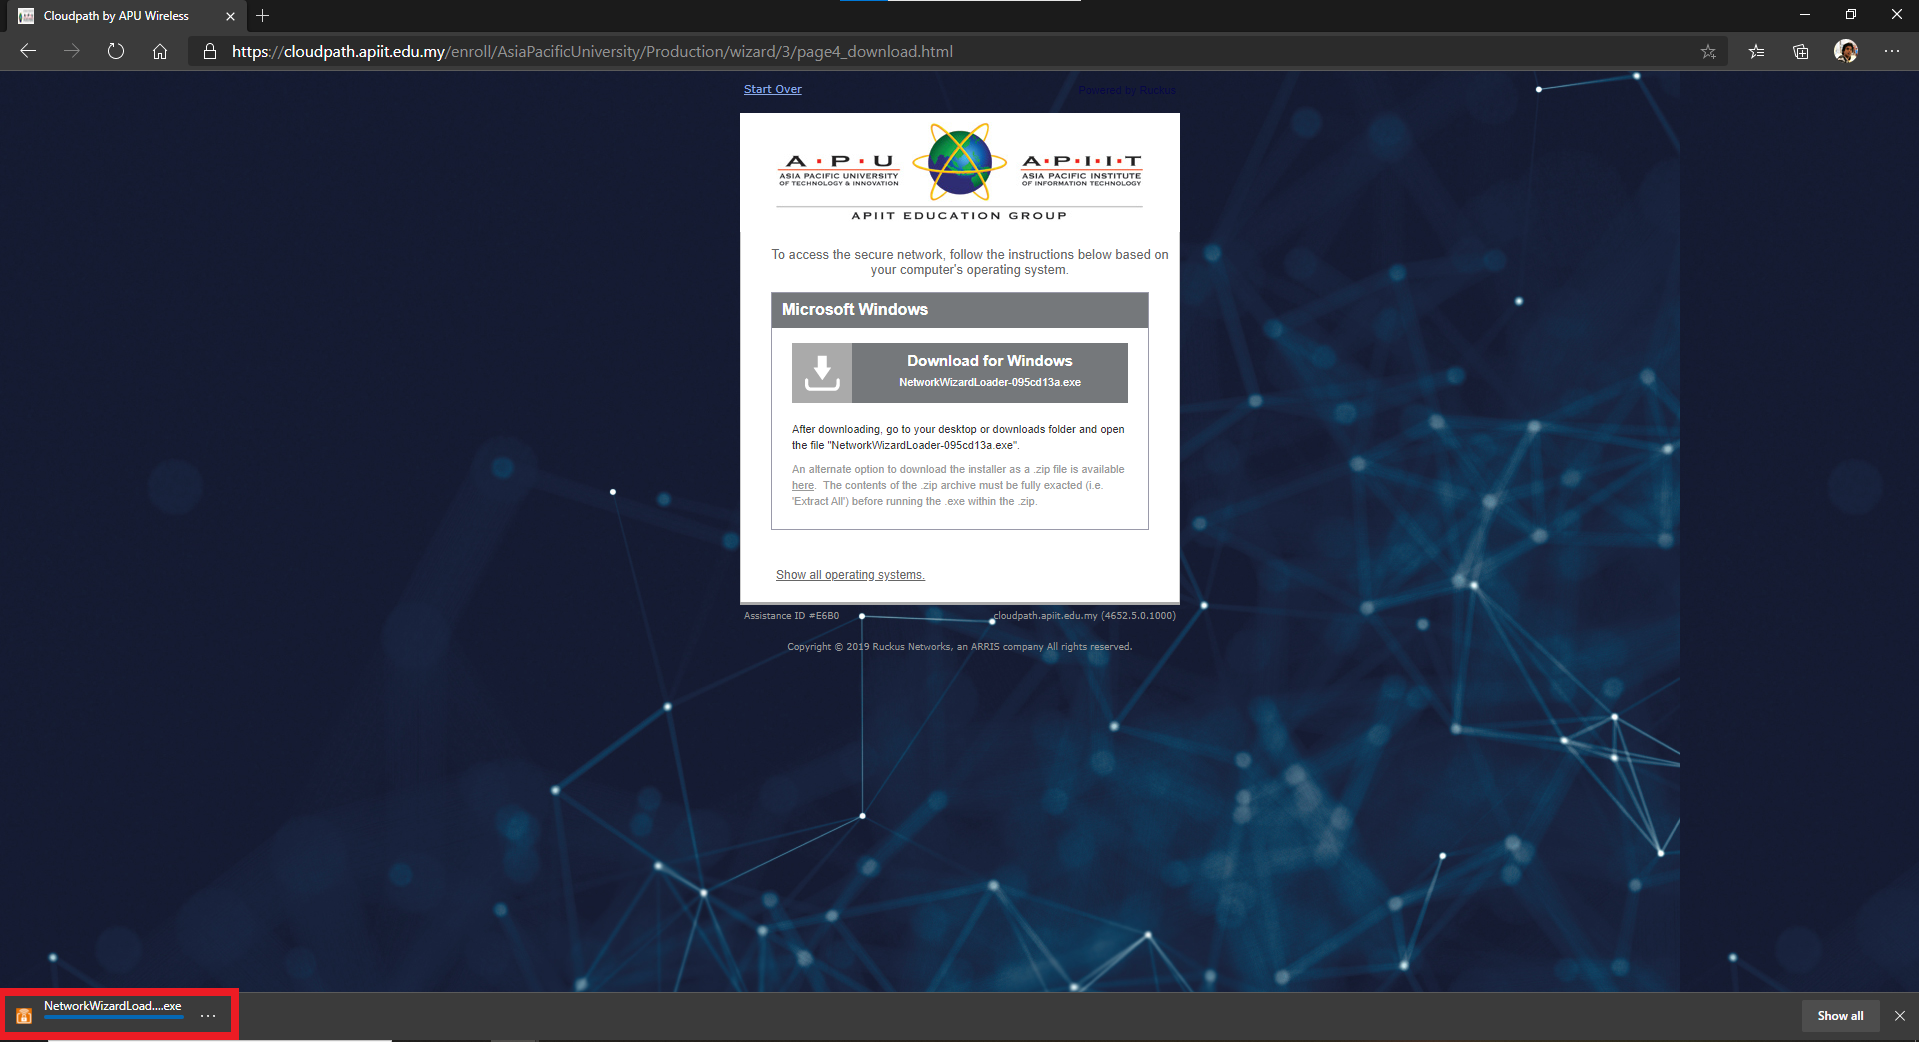
Step 5 . - After successful authentication, you will be presented with this page. Click on Download for Windows.
...
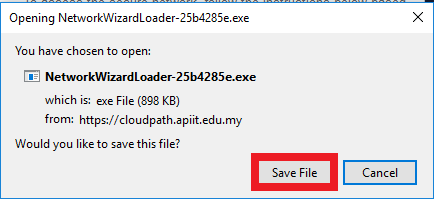
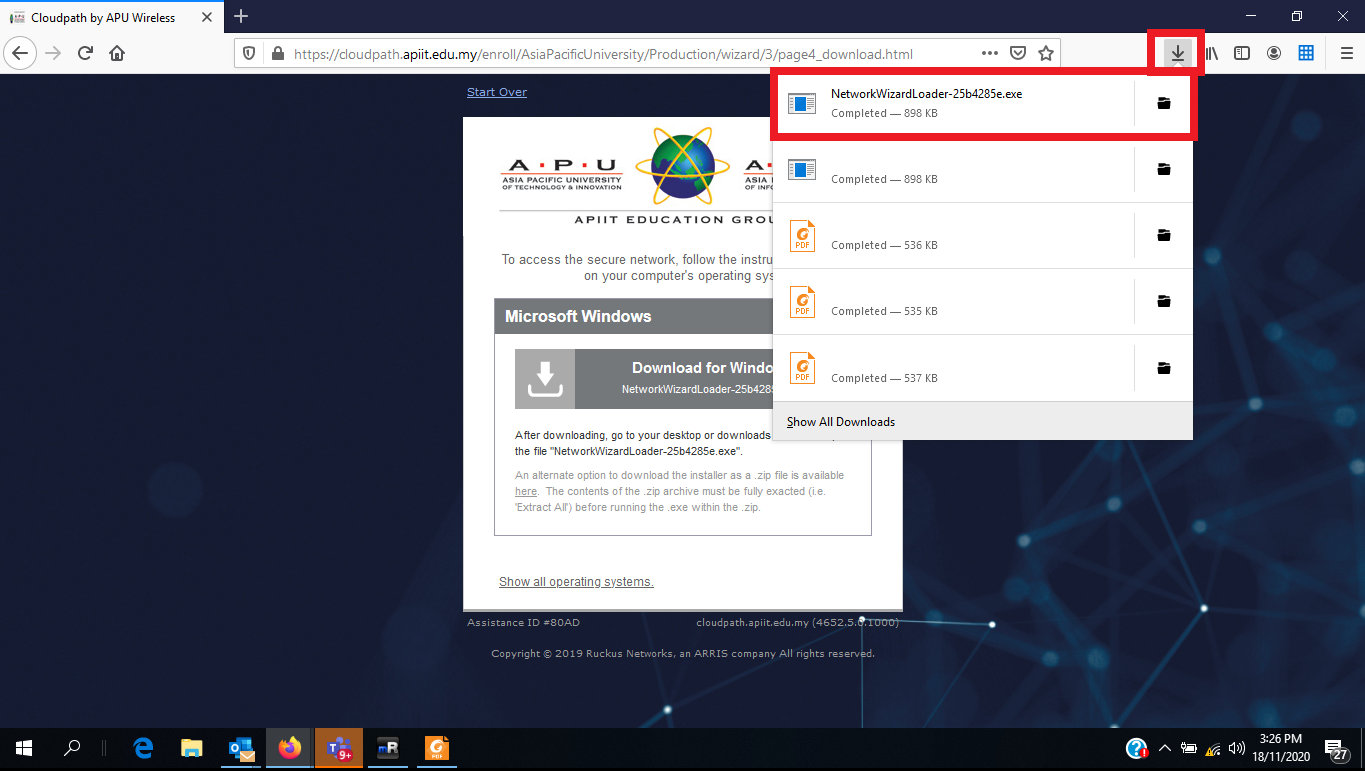
Step 6 . - You will be presented a window to download an app depending on your browser. Once downloaded, click on the installation file.
Microsoft Edge & Chrome | Mozilla Firefox |
|---|---|
 |   |
Running connection setup
Step 7 . - Launch the installation file, and it will install the Wi-Fi agent.
...
Ensure your Antivirus is not blocking the software from installation. Moreover, some windows users might receive a message ‘SmartScreen can’t be reached right now'. Click on Run (As per the image below)

Step 8 . - Once the installation has been completed, The Cloudpath application will configure your Wi-Fi automatically.
...
Finish connecting to Student@APU 2.0
Once the configuration is successful, you will be redirected to apu.edu.my to confirm that Internet connection is working.
...