
This is a guide to install Toon Boom on your computer and get a student license. This guide is divided into four (4) sections –
Section 1: Register Toon Boom Account
Note: If you already have a Toon Boom account (registered under Center of Excellence Student Program), skip to Section 2:https://apiit.atlassian.net/wiki/spaces/ITSM/pages/221151311/Toon+Boom+Student+License+Installation+Guide#Section-2%3A-Login-and-Download
Step 1 – Registration Form
Go to Center of Excellence Student Program – https://account.toonboom.com/signup?uval=https://store.toonboom.com/coe using your web browser. You will see a form to create a Toon Boom Account.

Fill in the appropriate fields with the following details:
Student Email (eg:TP012345@mail.apu.edu.my) | |
Country | Malaysia |
Member Profile | Student |
School | Asia Pacific University of Technology & Innovation |
Remember to check “By checking this box, you agree to our Terms and Conditions” and complete the CAPTCHA before you click the ‘Create Account’ button.
Step 2 – Confirm account creation
Once you submitted the form, you will be asked to confirm your account. Toon Boom will send an activation email to your student email. It will take up to 10Mins – 15Mins before you receive the email.
If you didn’t find the confirmation email in your student email inbox then, check inside your Spam folder or click the resend link.

Once you find the email titled “Activate your Toon Boom ID”, click on the button to ‘Activate Now’ your account. After you click ‘Activate Now’, your account will be activated and redirected to the login page.

Section 2: Login and Download
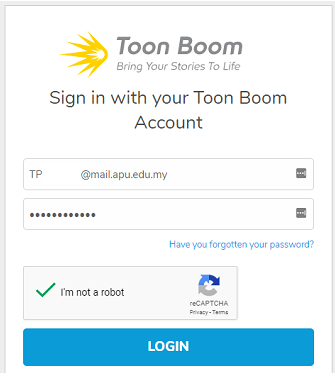
Step 1 – Login
Go to the Toom Boon Store & login to your Toon Boom Account.
Step 2 – Complete information
A form will be shown if you are logging in for the first time. Enter your student ID and year of education and click ‘Update’.
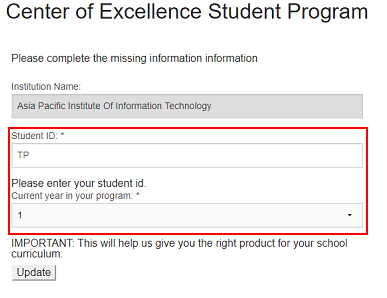
After clicking Update, you will be notified that you are qualified for the Toon Boom COE Student Program.

Scroll down to accept their Terms and Conditions by checking “By checking this box, you agree to the Terms & Conditions above” and click Enroll.

Step 3 – Download Software
Once you are enrolled in the COE Student Program, you will be presented two products for you to download and install: Harmony Premium and Storyboard Pro. Click on the relevant download link to start downloading the installer for the product.

Note: The desktop subscription will be valid until you graduate from the school.
Section 3: Install and Activate Toon Boom Harmony
Step 1 – Install Harmony Premium
Open the downloaded file and the installation process will begin.

Choose the Setup Language and click OK.

In this page, click Next.

In this page, select “ I accept the terms in the license agreement” and click Next.

You can change the install destination folder here (Leave Default if unsure). Click Next.

Choose Standalone and click Next.

Click Install.

The installation process will begin. Installation will take around 10 minutes depending on your computer specification.

Once the installation had completed, you will see this. Click Finish.

Step 2 – Activate Harmony Premium
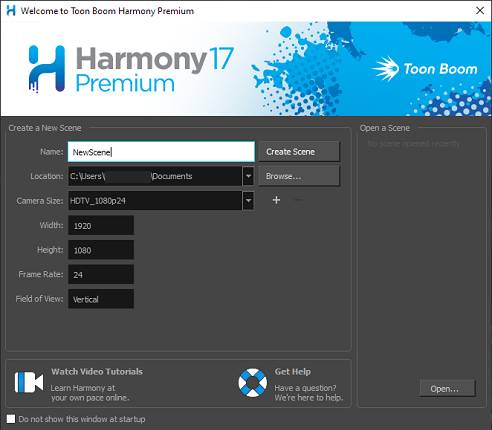
After installation is completed. Click on Start Menu and type in “harmony”. Click on Harmony Premium.

Since we haven’t activated the software yet, the License Wizard will show up. Click Activate Now.

Under the “Sign In with your Toon Boom ID” section, enter your Toon Boom Account credentials and click Sign In.

If successful, you will see this window. Click Start.

If you see this Welcome screen, it means Harmony Premium has been activated successfully. You can start using the software now. If you have any issues with installation then, skip to support:https://apiit.atlassian.net/wiki/spaces/ITSM/pages/221151311/Toon+Boom+Student+License+Installation+Guide#Support
Section 4: Install and Activate Toon Boom Storyboard
Step 1 – Install Storyboard Pro
Open the downloaded file and the installation process will begin.
Choose the Setup Language and click OK.
In this page, click Next.

In this page, select “ I accept the terms in the license agreement” and click Next.

You can change the install destination folder here (Leave Default if unsure). Click Next.

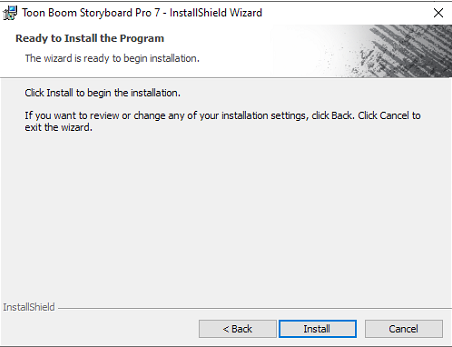
Click Install.
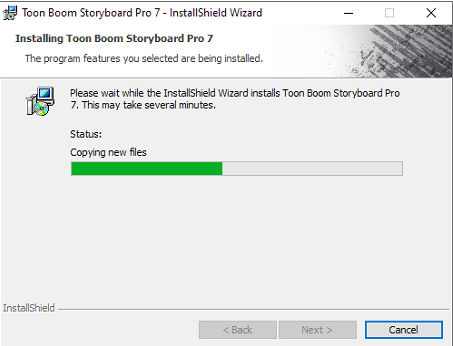
The installation process will begin. Installation will take around 10 minutes depending on your computer specification.
Once the installation had completed, you will see this. Click Finish.

Step 2 – Activate Storyboard Pro
After installation is completed. Click on Start Menu and type in “storyboard”. Click on Storyboard Pro 7.

Since we haven’t activated the software yet, the License Wizard will show up. Click Activate Now.

Under the “Sign In with your Toon Boom ID” section, enter your Toon Boom Account credentials and click Sign In.
If successful, you will see this window. Click Start.

If you see this Welcome screen, it means Storyboard Pro has been activated successfully. You can start using the software now.

Support
If you are facing any difficulties or errors during the installation/activation process, please open a ticket with our HelpCentre – IT Helpdesk or email assist@staffemail.apu.edu.my via your student email address. Please ensure to provide necessary screenshots and error messages for the support team to better understand the issue.