With MS Teams you can schedule online class/meetings and manage them and you can also have an instant meeting in order to have a quick meeting with team members. Please watch the videos below for more details:
0. Schedule a meeting for your class (duration 1:01 minute):
00:0001:02
1. Start a meeting / online class
To start a meeting, do one of the following:
Select the video camera icon in a new conversation.
Select a video camera in an existing conversation to keep all that conversation’s context.
In your video preview, enter a name for the meeting/class, and select Meet now.
Select the names of the team members you want to invite to the meeting. You can also type a phone number, a good way to add people outside your organization that isn’t using Teams.
2. Join a meeting / online class
Look for the meeting notification icon in a conversation to find a meeting.
Select Jump In to participate in the meeting.
3. Share your screen
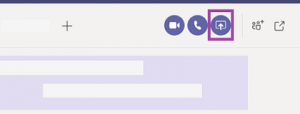
When you’re chatting with one or more people in Teams, you can instantly share your screen. Go to the chat controls in the upper-right corner and select Share.
Choose a window to share that specific program and its content, or select Desktop to share everything on your screen.
The other participants in the chat will receive a notification asking them to accept your screen share. Once they do, they’ll be able to see your screen and continue the chat.
When you’re done sharing, go to your meeting controls and select Stop sharing.
4. Record your meeting / online class
Select more options icon to record the meeting. You’ll be emailed when the video is ready so you can view, edit, and share with others.
5. Sharing whiteboard
You can share a whiteboard to make it available to all participants in a Teams meeting. That same whiteboard is simultaneously available in the Whiteboard applications on Windows 10, iOS, and on the web.
After joining a Teams meeting, click the Share icon in the share tray of that meeting.
In the Whiteboard section, select Microsoft Whiteboard.
6. View meetings
Select Calendar from the left sidebar to view your appointments and meetings for the day or workweek.
These appointments stay synchronized with your Outlook calendar.
Select a meeting invite to see what the meeting’s about, who’s attending, and to respond to the meeting.
7. Schedule a meeting (with external guests)
Select New meeting.
Type in a meeting title and enter a location. An online meeting is created by default.
Choose a start and end time, and add details if needed.
Enter names in the Invite people box to add them to the meeting.
Note: To invite someone outside your organization, type in their email address and they’ll get an invite to join as a guest — even if they don’t have Microsoft Teams.
See everyone’s availability in the Attendees list and, if needed, choose a suggested time or select Scheduling assistant to see more available times in a calendar view.
Under Select a channel to meet in, select the drop-down arrow to manage your meeting’s privacy settings:
Select None to keep your meeting private.
Select a channel to open the meeting to team members.
If your meeting gets posted in a channel, it’ll appear under the Posts tab. Team
members can set agendas, share files, or add comments.
Related Pages –
