...
You have to first make a connection between your macOS computer and printer server to communicate with printers. Figure 1.0 shows, from the top menu bar click on, Go > Connect to Server.

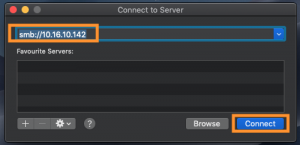
Fig 1.1: Enter printer server address and connect
...
Fig 1.1 shows, when you open Connect to Server, you have to enter server address 10.16.10.142 and click Connect. It will attempt to connect to the printer server and ask you to confirm your connection, please click Connect to confirm your connection to the server (see Fig 1.2).
...
Fig 1.3: Enter Staff account credential and click connect. Select ‘AddFollow U’ and click OK.
As shown on Fig 1.3, it will ask your staff account credential to connect to the server and to have access to the server files, click Connect. After you have entered your staff account credentials then, you will get access to AddFollowU folder in the server.
...
– The disk image file contains the installer file .pkg (Ysoft SafeQ Client Mac OS X.pkg), double click on this file and install it on your macOS computer.
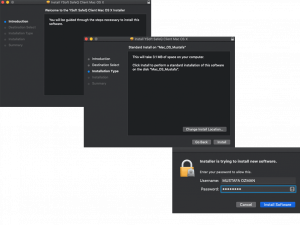
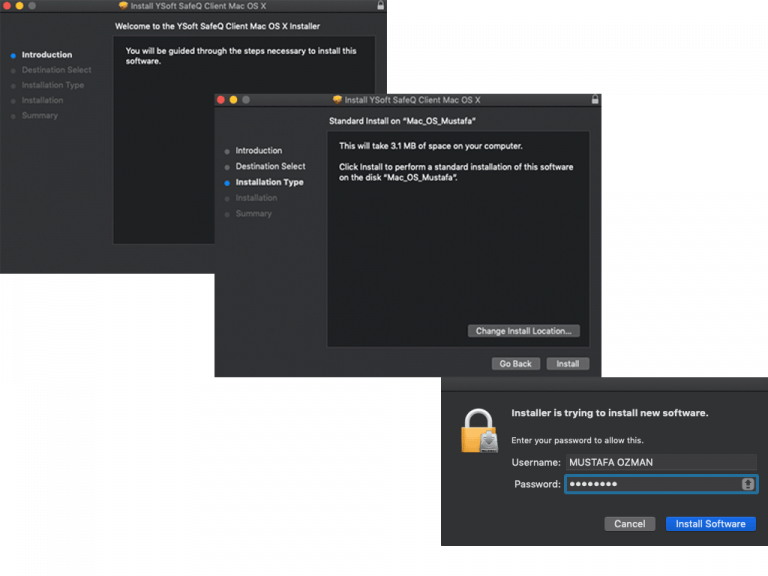
Fig 1.5: Installing print client requires computer admin account credential
The installer will guide you through the installation of the print client and for security reason it will require your computer admin account credentials to install the software (see Fig 1.5).
...
Fig 1.6: Save all your work and close all applications before you install because you will be logged out to complete installation.
Please make sure you have closed all applications and saved your work before installation because you will be logged out to finish installing the software (see Fig 1.6). Click Log Out and you have now successfully installed print client on your Mac to communicate with printer server.
...