If you receive an enquiry from student/parent/guardian/staff in your work email inbox then, you should change this email enquiry to a ticket and respond to enquiry via Agent Portal. It is basically creating ticket on behalf of the reporter (email sender). The following steps will guide you on how to change an email enquiry to a ticket on Virtual Help Centre using Jira Cloud add-in on Outlook;
Step 1 - Open Outlook application on your computer.
Step 2 - Go to the email enquiry send to your work email inbox.

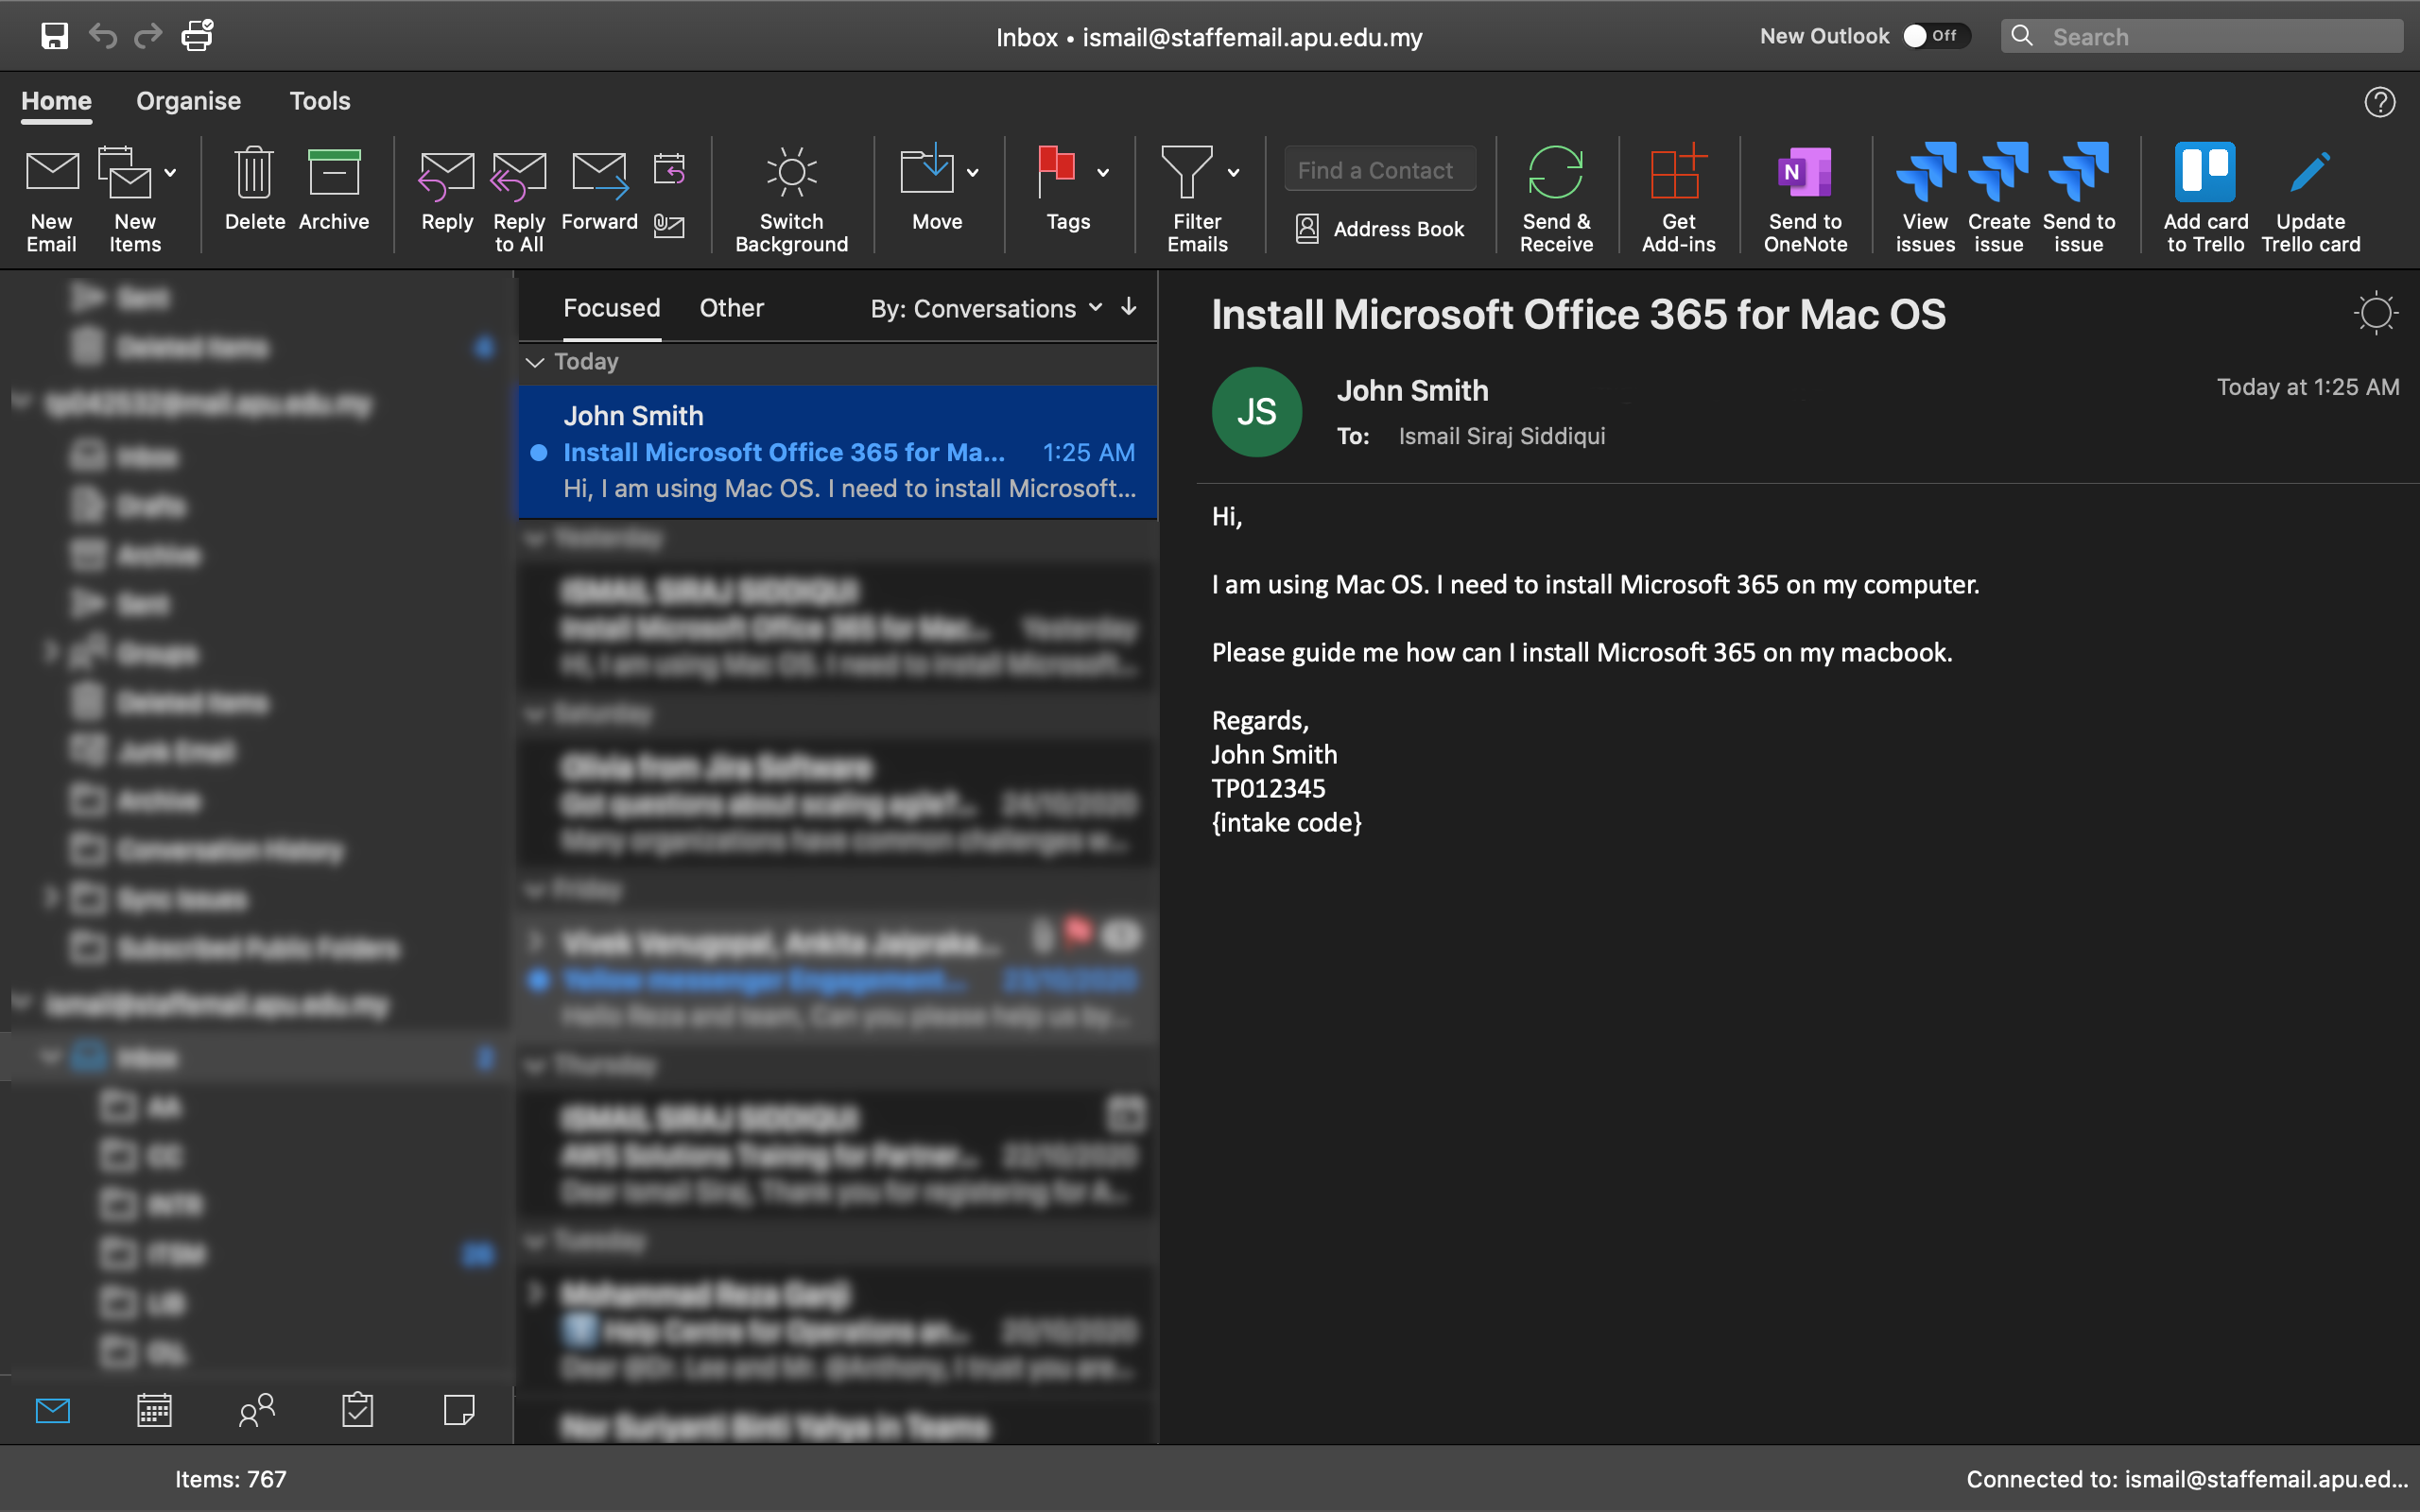
Step 3 - Click on Home tab.

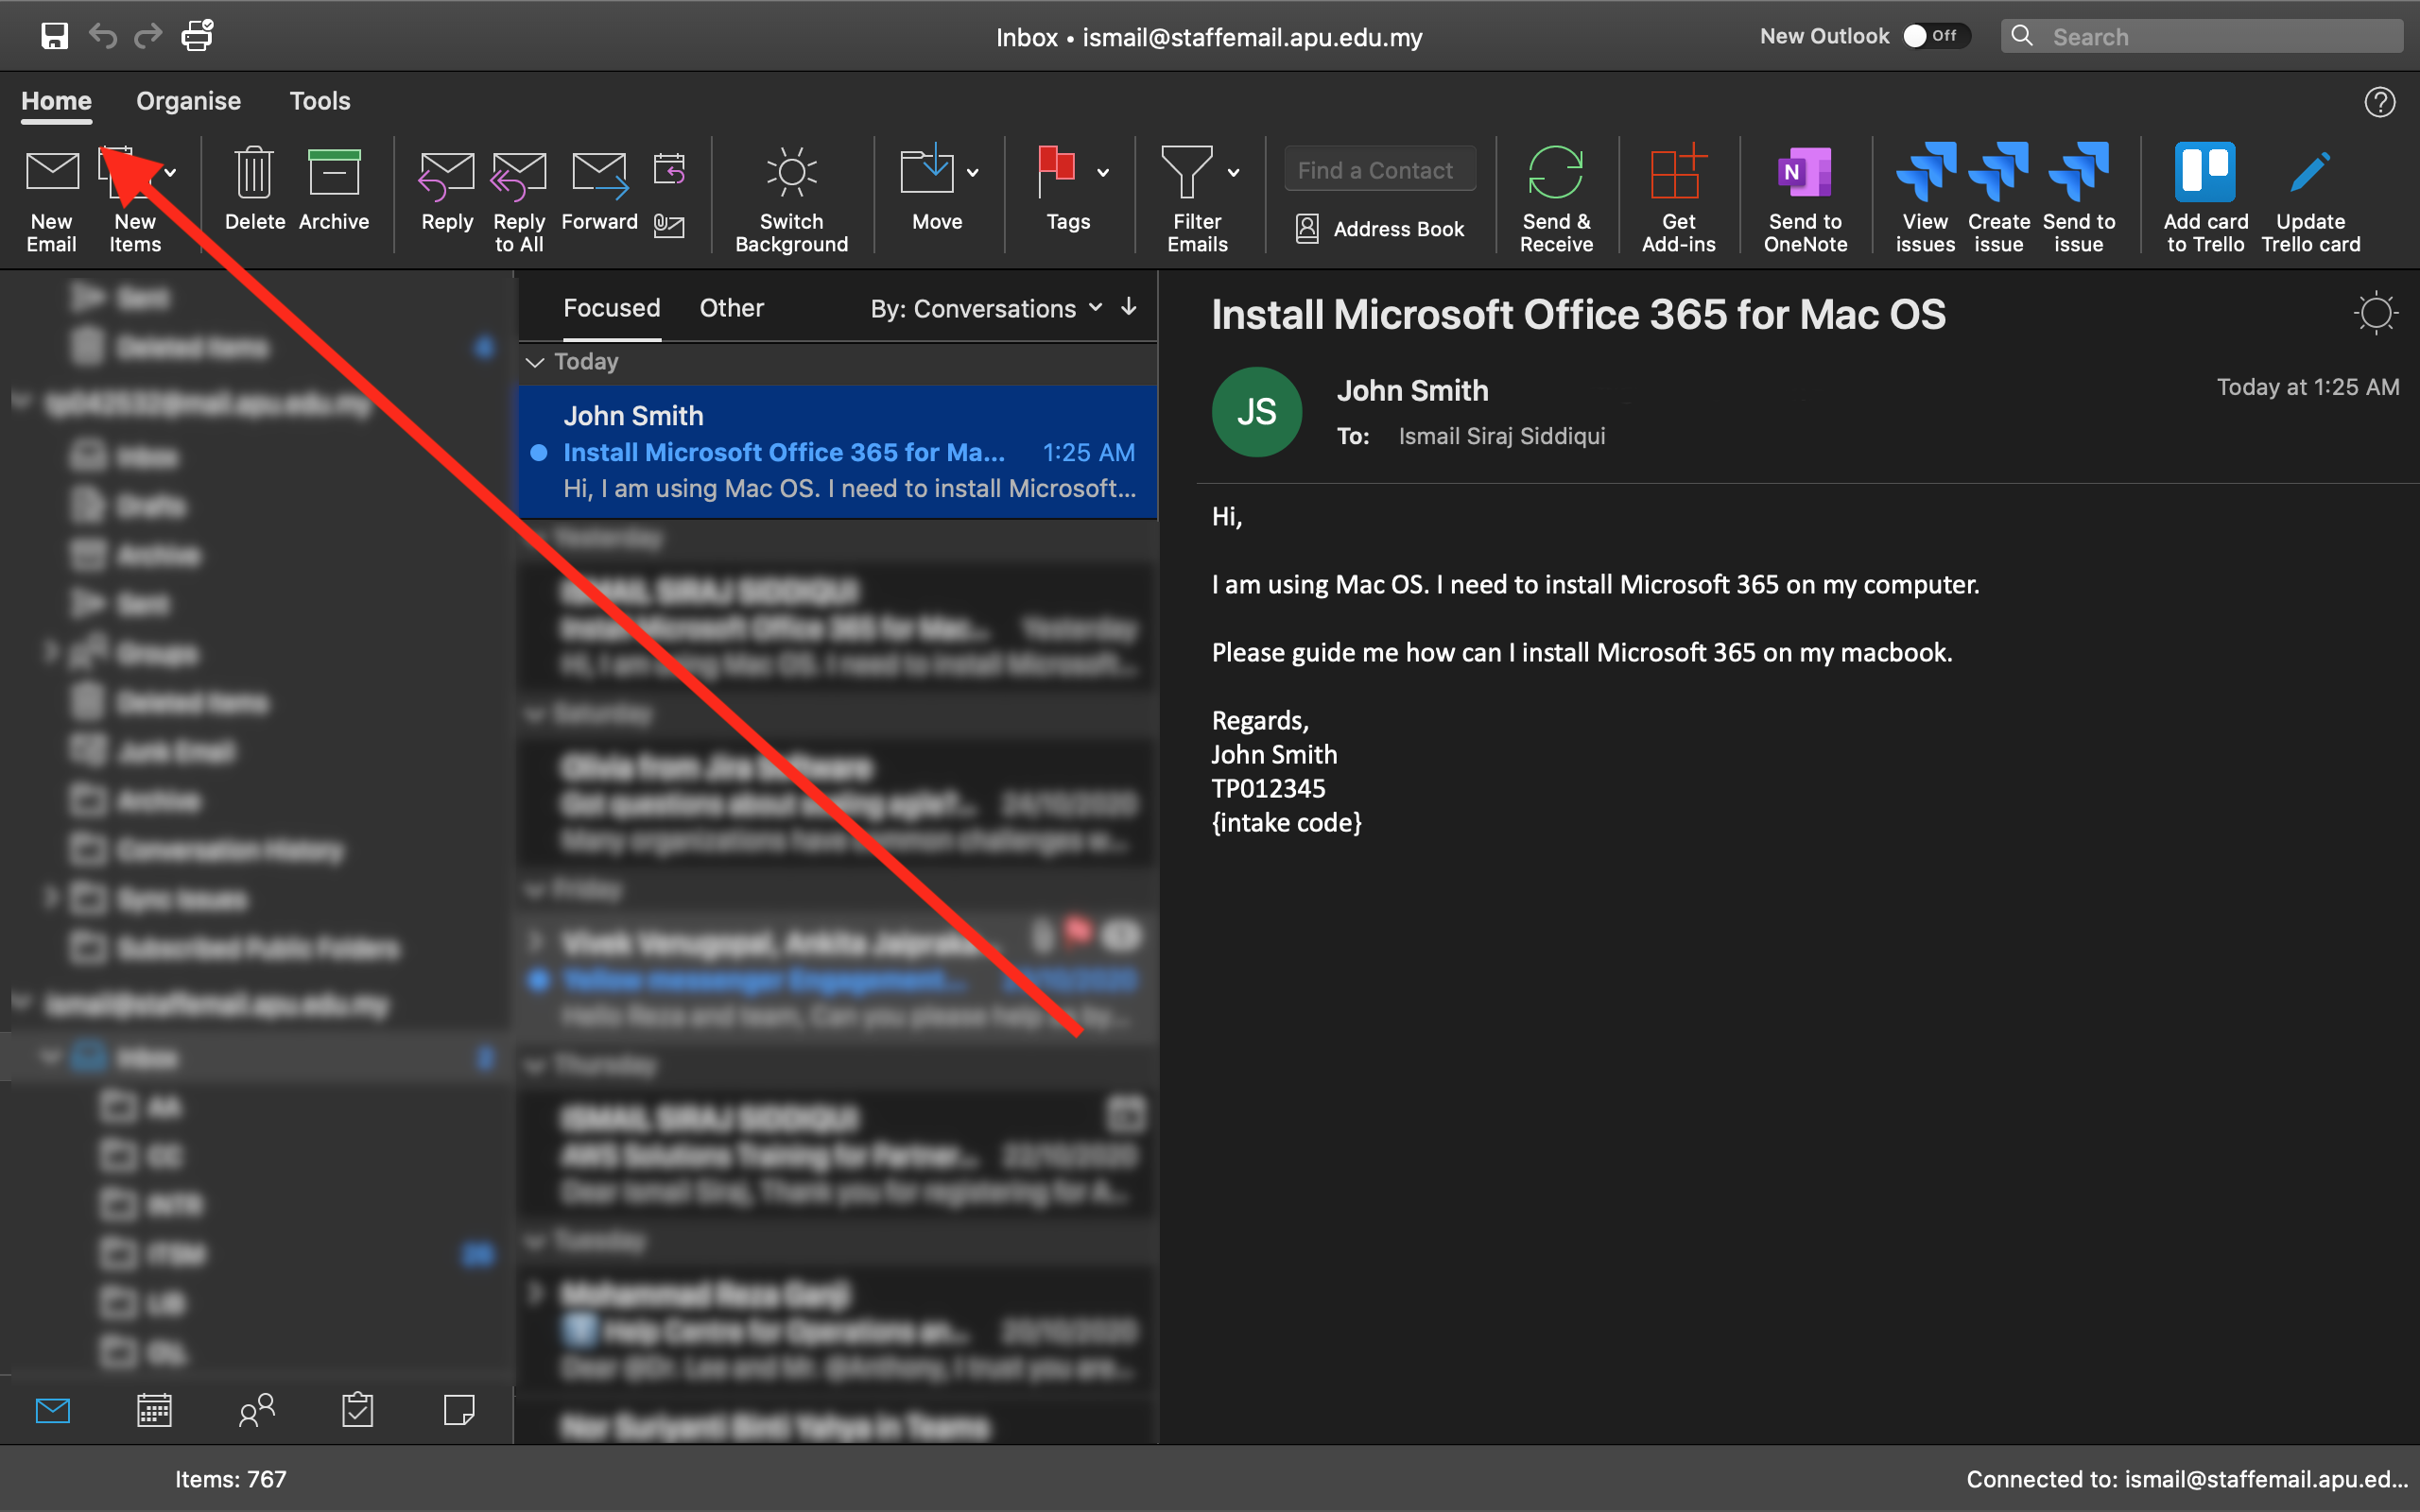
Step 4 - Find Jira Cloud add-in on your Home toolbar. Click on Create Issue.


Step 5 - Within the Outlook app, Jira Cloud window will slide-in and you have to select and enter information in the fields related to the enquiry. Fill in the required field related to the issue.

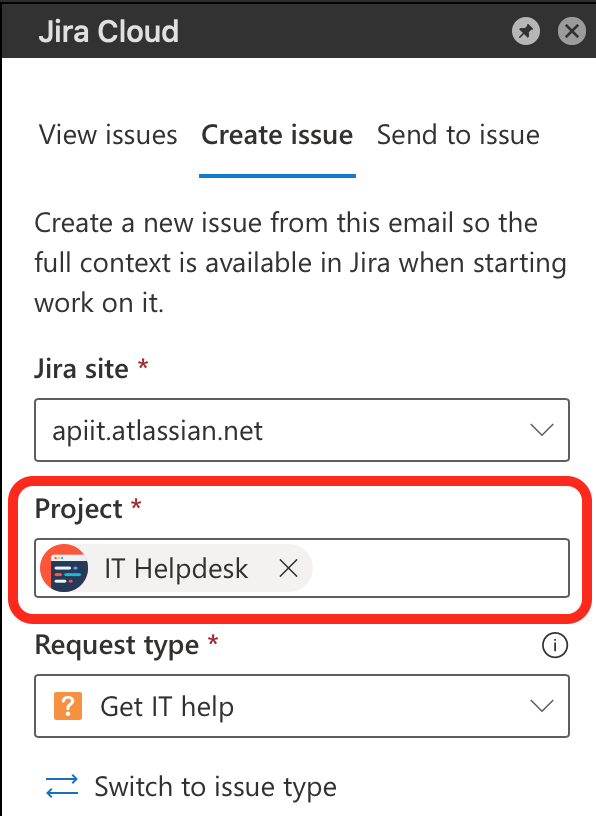
Step 6 - Select the service desk (Project).
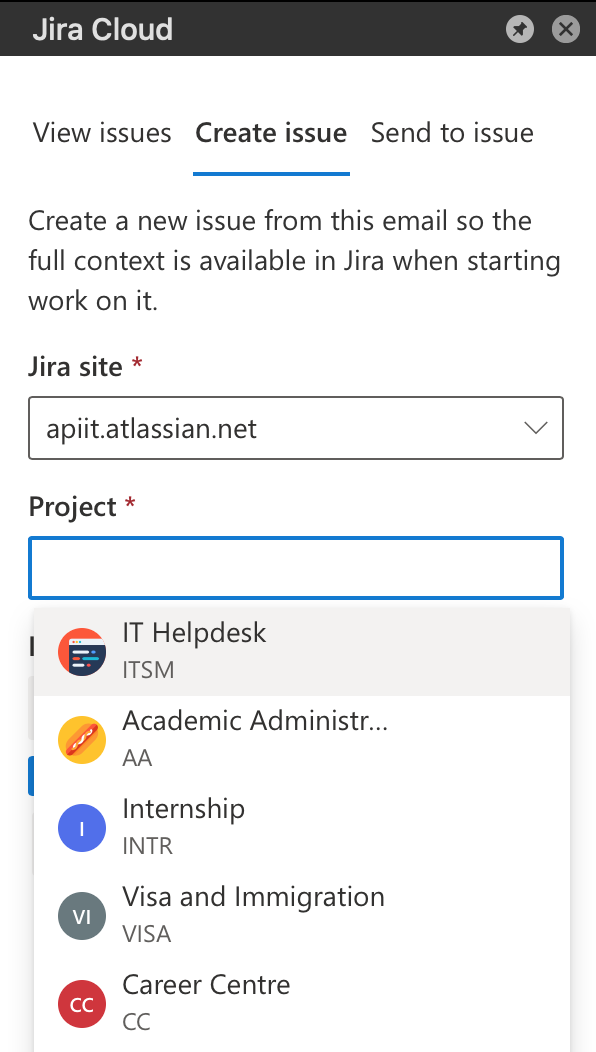
When you click on this field it will suggest you service desk(s) if you are agent in more than one service desk, make sure you select the correct one related to the ticket.
Step 7 - Select the Request type

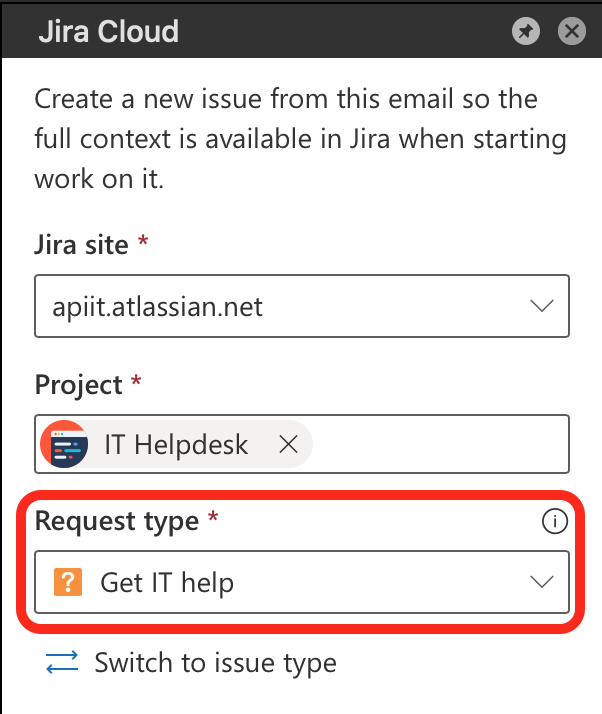
Make sure ticket is created in the correct service desk helpdesk project and request type.
type
because you are creating a ticket on behalf of the reporter (email sender).
Step 8 - Enter the email address of the reporter of the issue/enquiry.


It will auto suggest the reporter as it captures the email sender (reporter) and recipient. You can also manually enter the email address if it is a forwarded email enquiry or reporter email differs from the auto suggestion.
Step 9 - Enter subject of your ticket. It will auto-suggest summary based on the email or you can manually enter the subject.

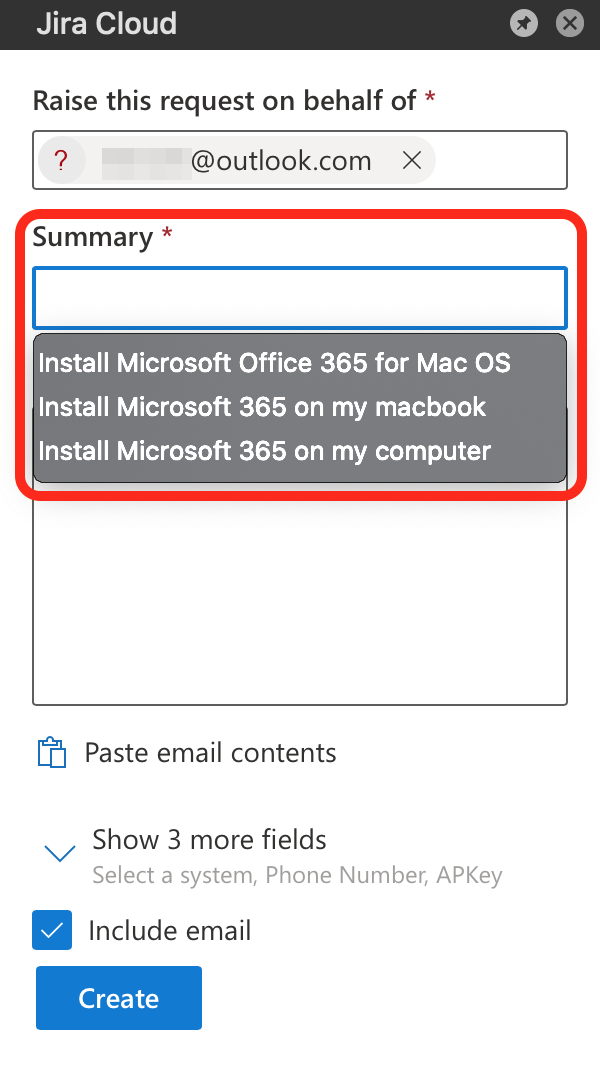
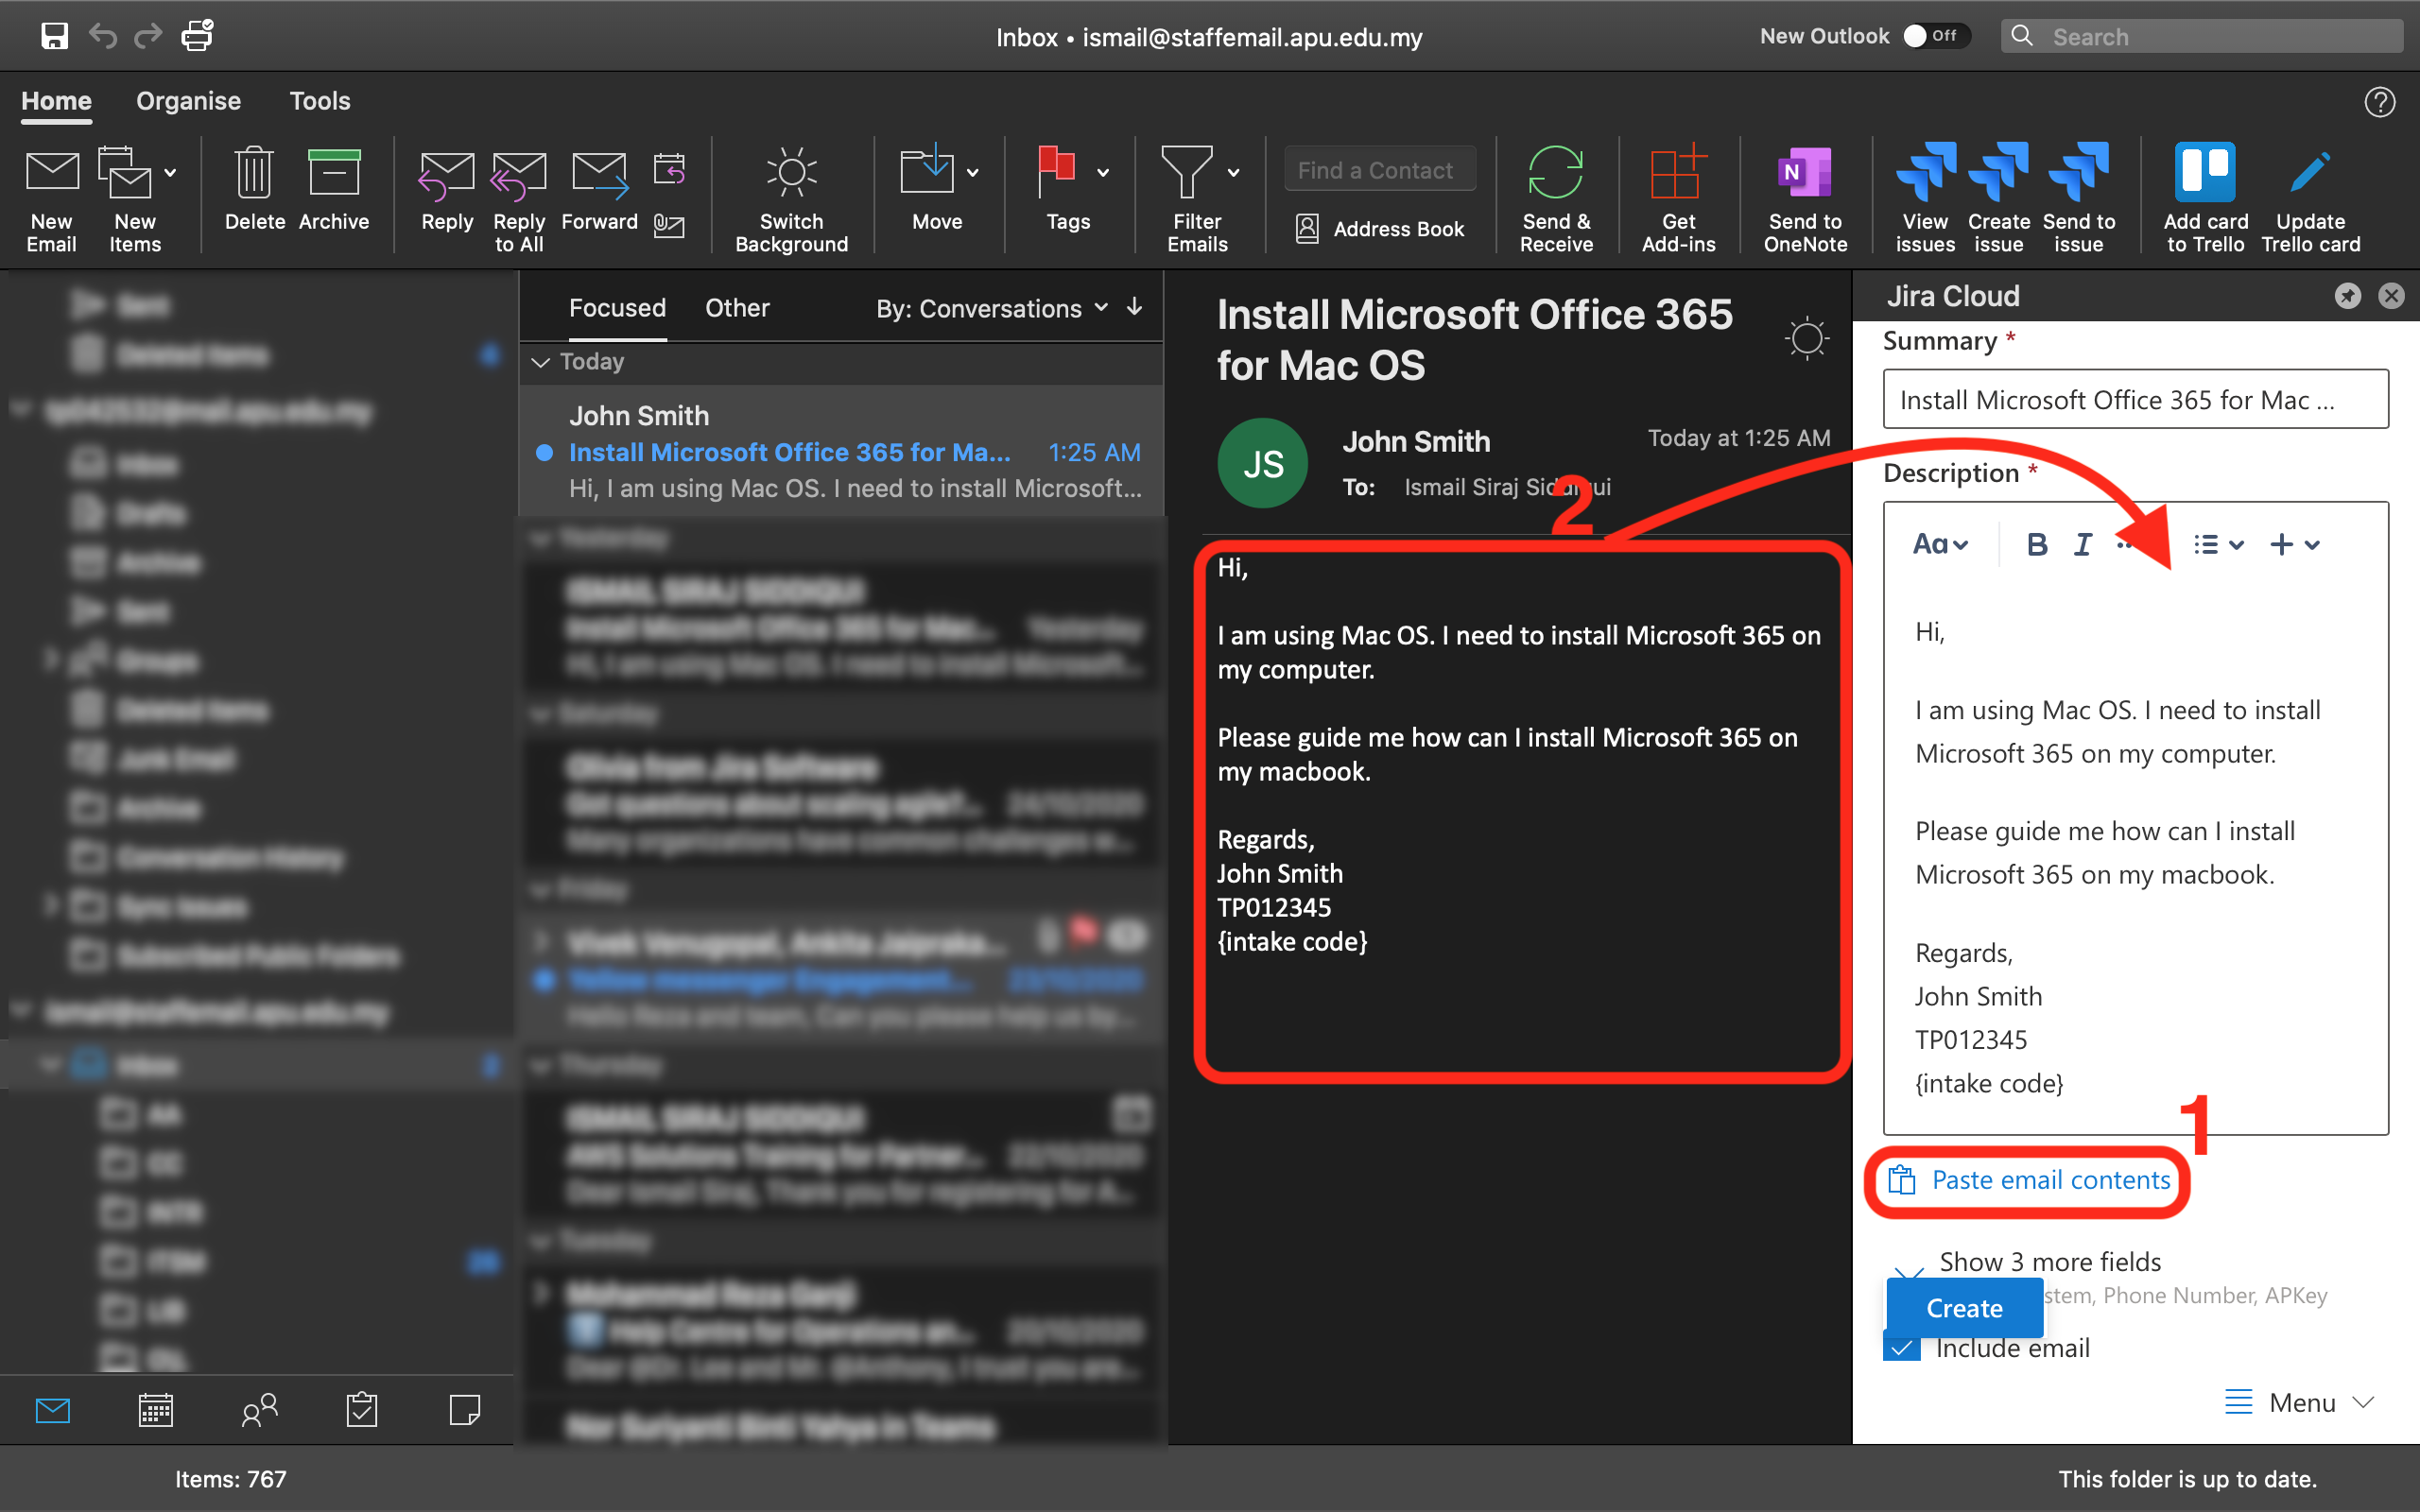
Step 10 - Click on paste email contents and it will copy all the email content and paste it in the ticket description

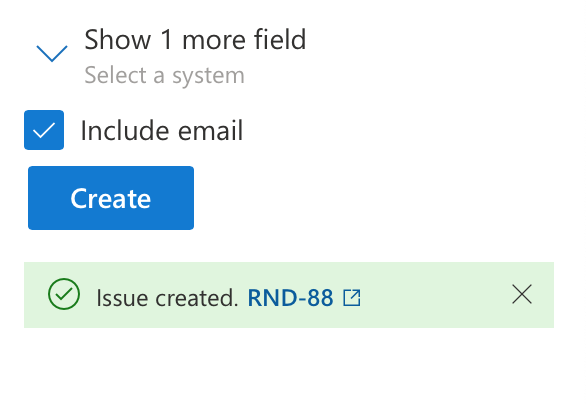
Step 11 - Check on include email

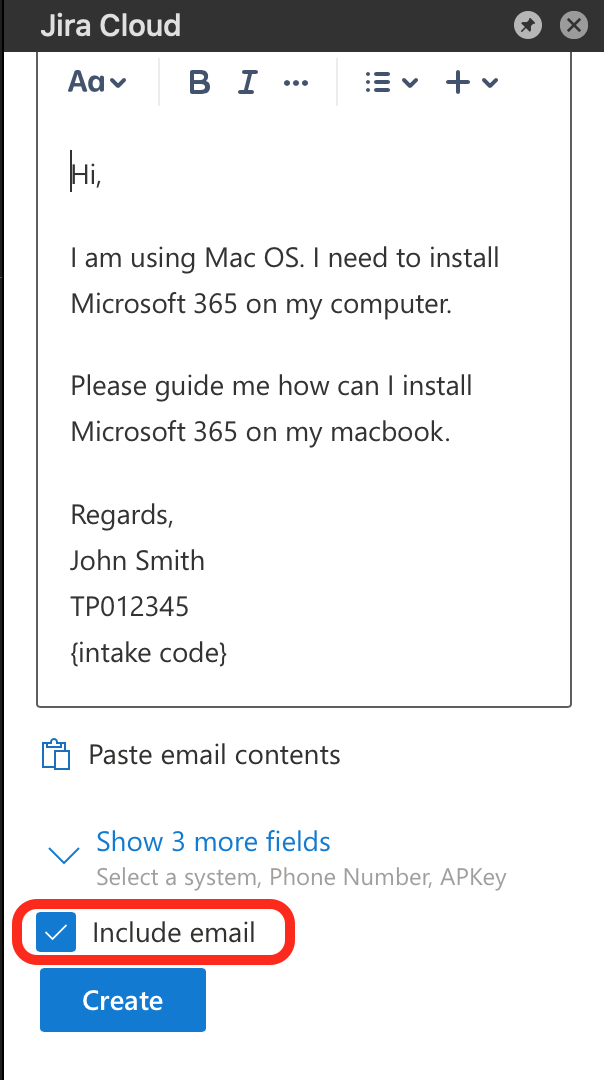
The more details you provide for ticket, it will reduce the resolution time for the issue. As different request types require different information from the reporter, these are sometimes mentioned in the email such as APKey (student ID), Intake Code, .etc.
Step 12 - Click Create

| Tip |
|---|
You have successfully changed an email enquiry to a ticket and also created a ticket on behalf of the reporter (email sender). You will get a confirmation with ticket ID and when you click on ticket ID it will redirect to ticket in Agent Portal. |